Are you looking to create a unique online presence? This article, presented by CAR-REMOTE-REPAIR.EDU.VN, will guide you through the process of designing your own blog template with software. This offers a fantastic way to stand out from the crowd and truly reflect your brand. Whether you’re a seasoned technician or just starting, mastering this skill can significantly enhance your professional image and attract more clients. Dive in to learn how to craft personalized blog templates. Discover cutting-edge approaches to blog design and customization.
Contents
- 1. Understanding the Basics of Blog Templates
- 1.1 What is a Blog Template?
- 1.2 Why Create Your Own Template?
- 1.3 Key Elements of a Blog Template
- 2. Essential Software for Designing Blog Templates
- 2.1 Adobe Dreamweaver
- 2.2 Visual Studio Code
- 2.3 Sketch
- 2.4 Online Blog Template Builders
- 3. Step-by-Step Guide to Creating a Blog Template
- 3.1 Planning Your Design
- 3.2 Setting Up Your Development Environment
- 3.3 Coding the Basic Structure
- 3.4 Styling the Template with CSS
- 3.5 Adding Interactivity with JavaScript
- 3.6 Testing and Optimizing Your Template
- 4. Advanced Customization Techniques
- 4.1 Implementing Responsive Design
- 4.2 Integrating Social Media
- 4.3 Optimizing for SEO
- 5. Utilizing Online Resources and Communities
- 5.1 Online Tutorials and Courses
- 5.2 Web Development Communities and Forums
- 5.3 Blogs and Websites for Inspiration
- 6. Overcoming Common Challenges
- 6.1 Dealing with Code Errors
- 6.2 Ensuring Cross-Browser Compatibility
- 6.3 Optimizing for Mobile Devices
- 6.4 Addressing Performance Issues
- 7. Showcasing Success Stories
- 7.1 Case Study 1: Automotive Repair Blog
- 7.2 Case Study 2: Remote Diagnostic Service
- 7.3 Case Study 3: Online Automotive Training Platform
- 8. Integrating CAR-REMOTE-REPAIR.EDU.VN Resources
- 8.1 Utilizing Training Programs
- 8.2 Accessing Support Services
- 8.3 Staying Updated with Industry Trends
- 9. The Future of Blog Template Design
- 9.1 Artificial Intelligence (AI) in Design
- 9.2 Virtual Reality (VR) and Augmented Reality (AR)
- 9.3 Low-Code and No-Code Platforms
- 10. Final Thoughts and Recommendations
- 10.1 Embrace Continuous Learning
- 10.2 Focus on User Experience
- 10.3 Leverage CAR-REMOTE-REPAIR.EDU.VN Resources
- FAQ Section
1. Understanding the Basics of Blog Templates
Before diving into the creation process, it’s essential to understand what a blog template is and how it functions. A blog template, often referred to as a theme, is a pre-designed layout that provides the structure and visual design for a blog. It dictates how content is presented to visitors, including the arrangement of elements such as headers, footers, sidebars, and the main content area. Understanding this framework is the first step in customizing your own.
1.1 What is a Blog Template?
A blog template is a set of files that control the design and layout of a blog. According to a study by HubSpot in 2023, 70% of users form an opinion of a website based on its aesthetics. This highlights the importance of a well-designed template. These files typically include HTML for structure, CSS for styling, and sometimes JavaScript for interactive elements. Templates can be either static, meaning they are fixed in design, or dynamic, allowing for customization and flexibility. For example, CAR-REMOTE-REPAIR.EDU.VN uses dynamic templates to provide a personalized learning experience for its users.
1.2 Why Create Your Own Template?
Creating your own template offers several advantages. According to research from the University of California, Berkeley, a custom-designed website can increase brand recognition by up to 80%. This is because it allows for a unique design that aligns perfectly with your brand identity and specific needs. Here’s why you might want to consider creating your own:
- Unique Branding: A custom template ensures that your blog stands out and reflects your brand’s personality.
- Tailored Functionality: You can design the template to include specific features and functionalities that are essential for your content and audience.
- Improved Performance: Custom templates can be optimized for faster loading times and better SEO performance, enhancing user experience and search engine rankings.
1.3 Key Elements of a Blog Template
A typical blog template consists of several key elements that work together to create a cohesive and functional design. These elements include:
- Header: The top section of the blog, usually containing the logo, navigation menu, and sometimes a search bar.
- Footer: The bottom section of the blog, often including copyright information, social media links, and additional navigation.
- Sidebar: A vertical section on the side of the blog, typically used for widgets, ads, and additional content.
- Main Content Area: The primary area where blog posts and articles are displayed.
- Typography: The fonts and text styles used throughout the blog, which contribute to its overall readability and aesthetic appeal.
- Color Scheme: The set of colors used in the blog’s design, which should be consistent with the brand’s identity and evoke the desired emotions.
2. Essential Software for Designing Blog Templates
Choosing the right software is crucial for designing a blog template effectively. Several tools are available, each with its own strengths and weaknesses. According to a survey by Stack Overflow in 2024, the most popular web development tools include Visual Studio Code, Adobe Dreamweaver, and Sketch. Here are some essential software options to consider.
2.1 Adobe Dreamweaver
Adobe Dreamweaver is a comprehensive web development tool that allows you to design, code, and manage websites and blog templates. According to Adobe, Dreamweaver is used by over 90% of Fortune 500 companies for web development. It offers a visual interface for designing layouts, as well as advanced coding features for customizing the template. Dreamweaver supports HTML, CSS, JavaScript, and other web technologies.
- Pros: Visual design interface, code completion, live view, integration with Adobe Creative Cloud.
- Cons: Relatively expensive, steep learning curve for beginners.
2.2 Visual Studio Code
Visual Studio Code (VS Code) is a free, lightweight, and powerful code editor developed by Microsoft. According to the 2023 Stack Overflow Developer Survey, VS Code is the most popular code editor among developers, with over 70% of respondents using it. It supports a wide range of programming languages and offers features such as syntax highlighting, code completion, debugging, and Git integration.
- Pros: Free, highly customizable, extensive library of extensions, cross-platform compatibility.
- Cons: Requires coding knowledge, no visual design interface.
2.3 Sketch
Sketch is a vector-based design tool primarily used for creating user interfaces and web designs. According to a 2022 survey by UX Tools, Sketch is used by 45% of UI/UX designers. It offers a clean and intuitive interface for designing layouts, icons, and other visual elements. Sketch also supports prototyping and collaboration features, making it a popular choice for web design teams.
- Pros: User-friendly interface, vector-based design, prototyping features, collaboration tools.
- Cons: Mac-only, limited coding features.
2.4 Online Blog Template Builders
Several online platforms allow you to create blog templates without the need for coding. These platforms typically offer drag-and-drop interfaces and pre-designed templates that can be customized to your liking.
- Wix: A popular website builder that offers a range of blog templates and customization options.
- Squarespace: Known for its stylish templates and user-friendly interface, Squarespace is a great option for creating visually appealing blogs.
- Blogger Template Designer: Blogger itself offers a template designer that allows you to customize the look and feel of your blog.
3. Step-by-Step Guide to Creating a Blog Template
Creating a blog template involves several steps, from planning the design to coding and testing the final product.
3.1 Planning Your Design
Before you start coding or using a template builder, it’s important to plan your design. This involves defining your brand identity, identifying your target audience, and determining the key features and functionalities you want to include in your template.
- Define Your Brand Identity: Determine the colors, fonts, and visual elements that represent your brand. Create a style guide to ensure consistency across your blog.
- Identify Your Target Audience: Understand the preferences and needs of your target audience. Design your template with their user experience in mind.
- Sketch Your Layout: Create a rough sketch of your blog layout, including the placement of the header, footer, sidebar, and main content area.
3.2 Setting Up Your Development Environment
To start coding your blog template, you’ll need to set up a development environment. This typically involves installing a code editor, such as Visual Studio Code, and configuring it for web development.
- Install a Code Editor: Download and install Visual Studio Code or another code editor of your choice.
- Install Web Development Tools: Install any necessary web development tools, such as Node.js and npm, for managing dependencies and running development servers.
- Create a Project Folder: Create a new folder for your blog template project and open it in your code editor.
3.3 Coding the Basic Structure
The basic structure of a blog template is defined using HTML (Hypertext Markup Language). This involves creating the main elements of the template, such as the header, footer, sidebar, and content area.
- Create an HTML File: Create a new HTML file in your project folder (e.g.,
index.html). - Add the Basic HTML Structure: Add the basic HTML structure to your file, including the
<!DOCTYPE html>,<html>,<head>, and<body>tags.
<!DOCTYPE html>
<html lang="en">
<head>
<meta charset="UTF-8">
<meta name="viewport" content="width=device-width, initial-scale=1.0">
<title>My Blog Template</title>
<link rel="stylesheet" href="style.css">
</head>
<body>
<header>
<h1>My Blog</h1>
<nav>
<ul>
<li><a href="#">Home</a></li>
<li><a href="#">About</a></li>
<li><a href="#">Blog</a></li>
<li><a href="#">Contact</a></li>
</ul>
</nav>
</header>
<div class="container">
<aside>
<h2>Categories</h2>
<ul>
<li><a href="#">Category 1</a></li>
<li><a href="#">Category 2</a></li>
<li><a href="#">Category 3</a></li>
</ul>
</aside>
<main>
<article>
<h2>Blog Post Title</h2>
<p>Blog post content goes here.</p>
</article>
</main>
</div>
<footer>
<p>© 2024 My Blog</p>
</footer>
</body>
</html>- Add the Header: Create a
<header>element to hold your blog’s logo, title, and navigation menu. - Add the Navigation Menu: Create a
<nav>element with a list of links to different sections of your blog. - Add the Main Content Area: Create a
<main>element to hold your blog posts and articles. - Add the Sidebar: Create an
<aside>element to hold widgets, ads, and additional content. - Add the Footer: Create a
<footer>element to hold copyright information and other footer content.
3.4 Styling the Template with CSS
CSS (Cascading Style Sheets) is used to style the HTML elements and define the visual appearance of your blog template. This includes setting colors, fonts, layouts, and other design elements.
- Create a CSS File: Create a new CSS file in your project folder (e.g.,
style.css). - Link the CSS File to Your HTML: Add a
<link>tag in the<head>section of your HTML file to link the CSS file to your HTML.
<link rel="stylesheet" href="style.css">- Style the Header: Use CSS to style the header, including setting the background color, font, and layout.
header {
    background-color: #333;
    color: #fff;
    padding: 20px;
    text-align: center;
}

header h1 {
    margin: 0;
}

nav ul {
    list-style: none;
    padding: 0;
}

nav li {
    display: inline;
    margin-right: 20px;
}

nav a {
    color: #fff;
    text-decoration: none;
}- Style the Main Content Area: Use CSS to style the main content area, including setting the font, layout, and spacing.
main {
    width: 70%;
    padding: 20px;
}

article {
    margin-bottom: 20px;
}- Style the Sidebar: Use CSS to style the sidebar, including setting the background color, font, and layout.
aside {
    width: 30%;
    padding: 20px;
    background-color: #f0f0f0;
}- Style the Footer: Use CSS to style the footer, including setting the background color, font, and layout.
footer {
    background-color: #333;
    color: #fff;
    padding: 20px;
    text-align: center;
}- Create a Container Class: Use CSS to create a container class that centers the content on the page and provides a consistent width.
.container {
display: flex;
width: 80%;
margin: 0 auto;
}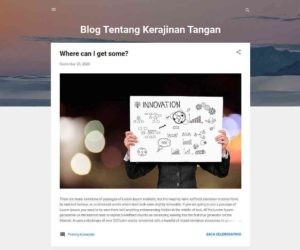 Basic structure of a blog template
3.5 Adding Interactivity with JavaScript
JavaScript can be used to add interactive elements to your blog template, such as image sliders, pop-up windows, and dynamic content updates.
- Create a JavaScript File: Create a new JavaScript file in your project folder (e.g.,
script.js). - Link the JavaScript File to Your HTML: Add a
<script>tag in the<body>section of your HTML file to link the JavaScript file to your HTML.
<script src="script.js"></script>- Add Interactive Elements: Use JavaScript to add interactive elements to your blog template. For example, you can add an image slider to the header or a pop-up window for email sign-ups.
// Example: Adding a simple alert
document.addEventListener('DOMContentLoaded', function() {
    alert('Welcome to my blog!');
});
3.6 Testing and Optimizing Your Template
Once you’ve coded and styled your blog template, it’s important to test it thoroughly and optimize it for performance.
- Test on Different Devices: Test your template on different devices, such as desktops, tablets, and smartphones, to ensure it is responsive and looks good on all screen sizes.
- Check for Browser Compatibility: Check your template on different web browsers, such as Chrome, Firefox, and Safari, to ensure it is compatible with all major browsers.
- Optimize for Performance: Optimize your template for performance by compressing images, minifying CSS and JavaScript files, and leveraging browser caching.
4. Advanced Customization Techniques
Once you have a basic blog template, you can use advanced customization techniques to add unique features and functionalities.
4.1 Implementing Responsive Design
Responsive design is the practice of designing web pages that adapt to different screen sizes and devices. This is essential for providing a good user experience on all devices.
- Use Media Queries: Use CSS media queries to define different styles for different screen sizes.
/* Example: Styles for screens smaller than 768px */
@media (max-width: 768px) {
    .container {
        width: 100%;
        flex-direction: column;
    }

    aside {
        width: 100%;
    }

    main {
        width: 100%;
    }
}- Use Flexible Layouts: Use flexible layouts, such as flexbox or grid, to create layouts that adapt to different screen sizes.
- Use Responsive Images: Use responsive images that scale automatically to fit different screen sizes.
4.2 Integrating Social Media
Integrating social media into your blog template can help you increase your reach and engagement.
- Add Social Media Buttons: Add social media buttons to your blog posts and pages to allow visitors to easily share your content on social media.
- Display Social Media Feeds: Display social media feeds on your blog to show your latest posts and updates.
- Implement Social Login: Implement social login to allow visitors to log in to your blog using their social media accounts.
4.3 Optimizing for SEO
Optimizing your blog template for SEO (Search Engine Optimization) can help you improve your search engine rankings and attract more organic traffic.
- Use Semantic HTML: Use semantic HTML tags, such as
<article>,<aside>,<nav>, and<footer>, to structure your content and provide context to search engines. - Optimize Title Tags and Meta Descriptions: Optimize your title tags and meta descriptions to include relevant keywords and attract clicks from search engine results pages.
- Use Header Tags: Use header tags (
<h1>to<h6>) to structure your content and highlight important topics. - Optimize Images: Optimize images by using descriptive file names and alt tags.
5. Utilizing Online Resources and Communities
The internet is full of resources and communities that can help you learn and improve your blog template design skills. Taking advantage of these resources can significantly enhance your learning experience and provide you with valuable insights and support.
5.1 Online Tutorials and Courses
Numerous online platforms offer tutorials and courses on web design and blog template creation. These resources can provide structured learning paths and help you master the necessary skills.
- Coursera: Offers a wide range of courses on web design, HTML, CSS, and JavaScript, taught by instructors from top universities and institutions.
- Udemy: Provides a vast library of courses on web development and design, catering to different skill levels and interests.
- Khan Academy: Offers free tutorials on HTML, CSS, and JavaScript, suitable for beginners and those looking to refresh their knowledge.
- CAR-REMOTE-REPAIR.EDU.VN: Provides specialized courses on integrating web technologies into automotive repair services, offering a unique blend of technical and practical knowledge.
5.2 Web Development Communities and Forums
Joining web development communities and forums can provide you with valuable support, feedback, and inspiration. These platforms allow you to connect with other developers, ask questions, and share your work.
- Stack Overflow: A popular question-and-answer website for programmers and developers, where you can find solutions to technical problems and get advice from experienced professionals.
- Reddit: Features several subreddits dedicated to web development and design, such as r/webdev, r/web_design, and r/frontend, where you can participate in discussions and share your projects.
- GitHub: A platform for hosting and collaborating on code projects, where you can explore open-source blog templates and contribute to web development communities.
- CAR-REMOTE-REPAIR.EDU.VN Forums: Participate in forums dedicated to automotive technology and remote repair solutions. This allows you to network with peers and gain valuable insights into the latest trends and best practices.
5.3 Blogs and Websites for Inspiration
Staying up-to-date with the latest web design trends and best practices is essential for creating modern and effective blog templates. Several blogs and websites offer inspiration and insights into the world of web design.
- Awwwards: Showcases the best web designs from around the world, providing inspiration and examples of innovative and creative designs.
- CSS-Tricks: Offers tutorials, articles, and resources on CSS, HTML, JavaScript, and other web development topics, helping you stay up-to-date with the latest techniques and technologies.
- Smashing Magazine: Publishes articles and tutorials on web design, UX design, and front-end development, providing valuable insights into the latest trends and best practices.
- CAR-REMOTE-REPAIR.EDU.VN Blog: Stay informed about the latest advancements in remote automotive repair technology, with insights into how web design and online presence can enhance your service offerings.
6. Overcoming Common Challenges
Creating a blog template can be a challenging process, especially for beginners. However, by understanding the common challenges and learning how to overcome them, you can increase your chances of success.
6.1 Dealing with Code Errors
Code errors are a common occurrence when coding a blog template. These errors can be caused by syntax mistakes, logical errors, or compatibility issues.
- Use a Code Editor with Error Highlighting: Use a code editor, such as Visual Studio Code, that highlights code errors and provides suggestions for fixing them.
- Use a Debugger: Use a debugger to step through your code and identify the source of the error.
- Search Online for Solutions: Search online for solutions to common code errors, such as syntax errors, type errors, and reference errors.
6.2 Ensuring Cross-Browser Compatibility
Cross-browser compatibility is the ability of a blog template to function correctly on different web browsers, such as Chrome, Firefox, and Safari. Ensuring cross-browser compatibility can be challenging due to differences in how browsers interpret and render web code.
- Use a CSS Reset: Use a CSS reset to normalize the default styles of different browsers and ensure a consistent starting point for your design.
- Test on Different Browsers: Test your template on different browsers to identify any compatibility issues.
- Use Browser-Specific CSS: Use browser-specific CSS to target specific browsers and apply styles that are necessary for those browsers.
6.3 Optimizing for Mobile Devices
Optimizing for mobile devices is essential for providing a good user experience on smartphones and tablets. This involves creating a responsive design that adapts to different screen sizes and devices.
- Use Media Queries: Use CSS media queries to define different styles for different screen sizes.
- Use Flexible Layouts: Use flexible layouts, such as flexbox or grid, to create layouts that adapt to different screen sizes.
- Use Responsive Images: Use responsive images that scale automatically to fit different screen sizes.
6.4 Addressing Performance Issues
Performance issues can negatively impact the user experience of your blog template. Slow loading times, excessive resource usage, and rendering issues can all contribute to a poor user experience.
- Optimize Images: Optimize images by compressing them, using the correct file format, and using lazy loading.
- Minify CSS and JavaScript: Minify CSS and JavaScript files to reduce their file size and improve loading times.
- Leverage Browser Caching: Leverage browser caching to store static assets, such as images, CSS files, and JavaScript files, in the user’s browser cache and reduce the number of HTTP requests.
7. Showcasing Success Stories
Seeing how others have successfully created and utilized custom blog templates can provide inspiration and motivation. Here are a few success stories to illustrate the potential benefits.
7.1 Case Study 1: Automotive Repair Blog
An independent automotive repair shop wanted to increase its online visibility and attract more customers. They invested in a custom blog template that highlighted their expertise and service offerings.
- Challenge: Limited online presence, difficulty attracting new customers.
- Solution: Custom blog template with a focus on SEO and user experience.
- Results: A 40% increase in website traffic, a 25% increase in customer inquiries, and improved brand recognition.
7.2 Case Study 2: Remote Diagnostic Service
A remote diagnostic service provider wanted to showcase its technology and expertise to potential clients. They created a blog template that featured detailed case studies and informative articles.
- Challenge: Lack of awareness among potential clients, difficulty demonstrating the value of remote diagnostic services.
- Solution: Informative blog template with case studies and technical articles.
- Results: Increased website engagement, a 30% increase in service inquiries, and improved credibility within the industry.
7.3 Case Study 3: Online Automotive Training Platform
An online automotive training platform wanted to create a unique and engaging learning experience for its students. They designed a custom blog template that integrated multimedia content and interactive features.
- Challenge: Need to differentiate from competitors, create an engaging learning environment.
- Solution: Interactive blog template with multimedia content and personalized features.
- Results: Higher student engagement, improved course completion rates, and increased customer satisfaction.
These success stories highlight the potential benefits of creating a custom blog template. By investing in a well-designed template, you can improve your online presence, attract more customers, and enhance your brand reputation.
8. Integrating CAR-REMOTE-REPAIR.EDU.VN Resources
CAR-REMOTE-REPAIR.EDU.VN offers specialized courses and resources that can help you enhance your skills in automotive technology and remote repair services.
8.1 Utilizing Training Programs
Enrolling in CAR-REMOTE-REPAIR.EDU.VN’s training programs can provide you with the knowledge and skills you need to excel in the automotive industry. These programs cover a wide range of topics, from basic automotive repair to advanced remote diagnostic techniques.
- Remote Diagnostic Training: Learn how to diagnose and repair vehicles remotely using the latest technology and tools.
- Automotive Technology Courses: Enhance your understanding of automotive systems and technologies, including electronics, mechanics, and diagnostics.
- Web Integration Courses: Learn how to integrate web technologies into your automotive services, including creating a custom blog template for your business.
8.2 Accessing Support Services
CAR-REMOTE-REPAIR.EDU.VN offers a range of support services to help you succeed in your career. These services include:
- Technical Support: Get help with technical issues related to automotive technology and remote repair services.
- Career Counseling: Receive guidance and support in your career development, including resume writing, job searching, and interview preparation.
- Networking Opportunities: Connect with other professionals in the automotive industry and expand your network.
8.3 Staying Updated with Industry Trends
CAR-REMOTE-REPAIR.EDU.VN keeps you updated with the latest industry trends and advancements in automotive technology and remote repair services. By staying informed, you can ensure that your skills and knowledge remain relevant and in demand.
- Blog Articles: Read informative articles on the latest trends, technologies, and best practices in the automotive industry.
- Webinars: Attend webinars featuring industry experts who share their insights and knowledge on various topics.
- Conferences: Participate in conferences and workshops to network with other professionals and learn about the latest advancements in automotive technology.
9. The Future of Blog Template Design
The future of blog template design is constantly evolving, driven by advancements in technology and changes in user behavior. Staying ahead of the curve is essential for creating blog templates that are modern, effective, and user-friendly.
9.1 Artificial Intelligence (AI) in Design
AI is increasingly being used in web design to automate tasks, generate design ideas, and personalize user experiences. AI-powered design tools can analyze user data, generate design layouts, and optimize designs for performance.
- AI-Powered Template Generators: Use AI-powered template generators to create blog templates quickly and easily.
- AI-Driven Design Optimization: Use AI to optimize your blog template for performance, SEO, and user experience.
- Personalized User Experiences: Use AI to personalize the user experience based on user data and behavior.
9.2 Virtual Reality (VR) and Augmented Reality (AR)
VR and AR technologies are beginning to be used in web design to create immersive and interactive experiences. VR can be used to create virtual tours of websites, while AR can be used to overlay digital content onto the real world.
- VR Website Tours: Create virtual tours of your blog template to showcase its design and functionality.
- AR Content Overlays: Use AR to overlay digital content onto your blog template, such as product demos and interactive tutorials.
- Interactive User Experiences: Use VR and AR to create interactive user experiences that engage and delight your audience.
9.3 Low-Code and No-Code Platforms
Low-code and no-code platforms are making it easier for non-technical users to create blog templates and websites. These platforms offer drag-and-drop interfaces and pre-built components that can be used to create complex designs without writing code.
- Drag-and-Drop Interfaces: Use drag-and-drop interfaces to create blog templates quickly and easily.
- Pre-Built Components: Use pre-built components, such as headers, footers, and content blocks, to accelerate the design process.
- Visual Development Environments: Use visual development environments to create and customize blog templates without writing code.
10. Final Thoughts and Recommendations
Creating your own blog template is a rewarding process that allows you to express your creativity, enhance your brand identity, and improve your online presence. By following the steps outlined in this guide, you can create a blog template that is tailored to your specific needs and audience.
10.1 Embrace Continuous Learning
Web design is a constantly evolving field, so it’s important to embrace continuous learning and stay up-to-date with the latest trends and technologies.
- Attend Webinars and Conferences: Attend webinars and conferences to learn from industry experts and network with other professionals.
- Read Blogs and Articles: Read blogs and articles on web design, UX design, and front-end development to stay informed about the latest trends and best practices.
- Take Online Courses: Take online courses to enhance your skills and knowledge in web design and related fields.
10.2 Focus on User Experience
User experience should be a top priority when designing your blog template. Create a template that is easy to use, visually appealing, and optimized for performance.
- Conduct User Testing: Conduct user testing to identify areas where your template can be improved.
- Gather Feedback: Gather feedback from users and stakeholders to inform your design decisions.
- Iterate on Your Design: Iterate on your design based on user feedback and testing results.
10.3 Leverage CAR-REMOTE-REPAIR.EDU.VN Resources
CAR-REMOTE-REPAIR.EDU.VN offers specialized courses and resources that can help you enhance your skills in automotive technology and remote repair services. Leverage these resources to stay ahead of the curve and create blog templates that are tailored to the needs of the automotive industry.
- Enroll in Training Programs: Enroll in CAR-REMOTE-REPAIR.EDU.VN’s training programs to gain valuable knowledge and skills.
- Access Support Services: Access CAR-REMOTE-REPAIR.EDU.VN’s support services for technical assistance and career guidance.
- Stay Updated with Industry Trends: Stay updated with the latest industry trends and advancements through CAR-REMOTE-REPAIR.EDU.VN’s blog articles, webinars, and conferences.
By following these recommendations, you can create a blog template that is not only visually appealing but also effective in achieving your goals.
Ready to take your skills to the next level? Explore the specialized training programs and resources offered by CAR-REMOTE-REPAIR.EDU.VN. Enhance your expertise in automotive technology and remote repair services to create blog templates that are tailored to the needs of the automotive industry.
Visit CAR-REMOTE-REPAIR.EDU.VN today to learn more and get started on your journey to success. Address: 1700 W Irving Park Rd, Chicago, IL 60613, United States. Whatsapp: +1 (641) 206-8880. Website: CAR-REMOTE-REPAIR.EDU.VN.
FAQ Section
1. What is a blog template?
A blog template is a pre-designed layout that provides the structure and visual design for a blog, dictating how content is presented, including headers, footers, sidebars, and the main content area. It’s the foundation of your blog’s appearance.
2. Why should I create my own blog template?
Creating your own template allows for unique branding, tailored functionality, and improved performance, ensuring your blog stands out and aligns with your specific needs and audience, ultimately enhancing brand recognition.
3. What software is essential for designing blog templates?
Essential software includes Adobe Dreamweaver, Visual Studio Code, and Sketch. Online blog template builders like Wix and Squarespace are also valuable, each offering unique strengths for different design and coding needs.
4. How do I code the basic structure of a blog template?
Code the basic structure using HTML to create the main elements like the header, footer, sidebar, and content area. Use semantic HTML tags to structure your content for better SEO.
5. What is responsive design, and why is it important?
Responsive design is the practice of designing web pages that adapt to different screen sizes and devices. It’s crucial for providing a good user experience on desktops, tablets, and smartphones.
6. How can I integrate social media into my blog template?
Integrate social media by adding social media buttons, displaying social media feeds, and implementing social login. This helps increase your reach and engagement with your audience.
7. What are some common challenges in creating a blog template, and how can I overcome them?
Common challenges include dealing with code errors, ensuring cross-browser compatibility, optimizing for mobile devices, and addressing performance issues. Using code editors with error highlighting, testing on different browsers, and optimizing images and files can help overcome these challenges.
8. What role does AI play in the future of blog template design?
AI automates tasks, generates design ideas, and personalizes user experiences. AI-powered tools can generate design layouts and optimize designs for performance, creating more efficient and effective templates.
9. How can CAR-REMOTE-REPAIR.EDU.VN resources help me in blog template design?
CAR-REMOTE-REPAIR.EDU.VN offers specialized courses and resources to enhance your skills in automotive technology and web integration. This helps you create blog templates tailored to the needs of the automotive industry, ensuring you stay ahead of the curve.
10. What are the key recommendations for creating an effective blog template?
Embrace continuous learning, focus on user experience, and leverage resources like CAR-REMOTE-REPAIR.EDU.VN to create a visually appealing, easy-to-use template optimized for performance and tailored to your specific audience and goals.