Are you looking for a straightforward way to activate Office 2016 without needing extra software? At CAR-REMOTE-REPAIR.EDU.VN, we offer effective solutions to keep your Office suite fully functional. Discover hassle-free methods to activate Office 2016 using simple techniques, ensuring you can keep using your essential tools without interruption. Learn how to optimize your workflow with these simple and free tips, avoid future problems with unlicensed software, and ensure smooth operation of Word, Excel, and PowerPoint.
Contents
- 1. Why Activate Office 2016 Without Software?
- 2. Understanding the Need for Activation
- 2.1. What Happens When Office 2016 is Not Activated?
- 2.2. Common Scenarios Requiring Activation
- 3. How to Check If Your Office 2016 Is Activated
- 3.1. Checking Activation Status via Word
- 3.2. Using Command Prompt (CMD) to Verify Activation
- 3.3. Interpreting the Results
- 4. Activating Office 2016 Using CMD: A Step-by-Step Guide
- 4.1. Prerequisites
- 4.2. Step-by-Step Activation Process
- 4.3. Troubleshooting Common Issues
- 5. Activating Office 2016 Using Batch File: A Comprehensive Guide
- 5.1. Understanding Batch Files
- 5.2. Creating the Activation Batch File
- 5.3. Running the Batch File
- 5.4. Customizing the Batch File
- 5.5. Troubleshooting Batch File Issues
- 6. Overcoming Common Activation Errors
- 6.1. “Windows Script Host Access is Disabled” Error
- Solution:
- 6.2. “The Activation Server is Unavailable” Error
- Solution:
- 6.3. “Access Denied” Error
- Solution:
- 6.4. Product Key Errors
- Solution:
- 6.5. Activation Still Failing After Troubleshooting
- 7. Ensuring Permanent Activation
- 7.1. Understanding Activation Validity
- 7.2. Checking the Activation Expiry Date
- 7.3. Renewing the Activation
- 7.4. Automating Activation Renewal
- 8. Removing “Get Genuine Office” Notifications
- 8.1. Understanding the Notifications
- 8.2. Method 1: Editing the Registry
- 8.3. Method 2: Using Task Scheduler
- 8.4. Method 3: Deleting or Renaming the Office Notification File
- 8.5. Considerations
- 9. The Role of CAR-REMOTE-REPAIR.EDU.VN in Automotive Technology
- 9.1. Specialized Training Programs
- 9.2. Remote Support Services
- 9.3. Benefits of Our Services
- 9.4. Commitment to Excellence
- 9.5. Contact Us
- 10. FAQs: Activating Office 2016 Without Software
- 10.1. Is it legal to activate Office 2016 without a product key?
- 10.2. Can I use the CMD method on all versions of Windows?
- 10.3. How long does the activation last when using the CMD method?
- 10.4. Is it safe to use batch files for Office activation?
- 10.5. What should I do if the KMS server is not working?
- 10.6. Can I activate Office 2016 without an internet connection?
1. Why Activate Office 2016 Without Software?
Activating Office 2016 without additional software is a practical solution for several compelling reasons. It eliminates the need to download potentially risky programs, simplifies the activation process, and provides a cost-effective way to continue using essential office applications.
- Avoid Risky Downloads: Downloading software from unofficial sources can expose your system to malware and viruses. Using built-in Windows tools reduces this risk significantly.
- Simplified Process: Activating via command prompt (CMD) or batch files is straightforward, often requiring just a few steps.
- Cost-Effective: This method allows you to fully utilize Office 2016 without purchasing a product key, saving you money.
- No Compatibility Issues: Built-in methods ensure compatibility with your operating system, reducing the risk of software conflicts.
- Quick Activation: These methods are generally faster than downloading, installing, and running third-party activators.
2. Understanding the Need for Activation
Microsoft Office 2016 requires activation to unlock its full range of features and ensure continued use. Without activation, the software operates in a limited mode, which can severely restrict your ability to create, edit, and save documents. This section explores why activation is essential and what limitations you might face without it.
2.1. What Happens When Office 2016 is Not Activated?
When Office 2016 remains unactivated, users encounter several frustrating limitations that significantly hamper their productivity and workflow.
- Reduced Functionality: Key features like editing, creating new documents, or even printing may be disabled.
- Persistent Activation Prompts: The software constantly displays messages prompting activation, disrupting your work.
- “Unlicensed Product” Errors: Frequent error messages indicate that the product is not fully functional, which can be distracting.
- Inability to Access Updates: Unactivated versions may not receive important updates, leaving the software vulnerable to security threats and bugs.
- Limited Usage Period: Microsoft often restricts the usage period for unactivated versions, eventually rendering them unusable.
2.2. Common Scenarios Requiring Activation
Activation becomes necessary in various common scenarios to ensure seamless and continuous use of Microsoft Office 2016.
- Fresh Installation: After installing Office 2016 on a new device, activation is required to unlock all features.
- Reinstallation After Formatting: When reinstalling the operating system or formatting a drive, Office needs to be reactivated.
- Hardware Changes: Significant hardware upgrades can sometimes trigger the need for reactivation.
- Trial Period Expiry: When the initial trial period ends, activation is essential to continue using the software.
- Volume License Key Issues: Organizations using volume license keys may encounter activation problems if the keys are not properly managed or become invalid.
3. How to Check If Your Office 2016 Is Activated
Before attempting to activate Office 2016, it’s wise to verify its current activation status. This ensures you don’t waste time on a process that’s already complete or helps diagnose any activation issues you might be facing.
3.1. Checking Activation Status via Word
One of the easiest ways to check the activation status of Office 2016 is through Microsoft Word. Here’s how you can do it:
-
Open Microsoft Word: Launch the Word 2016 application on your computer.
-
Go to “File”: Click on the “File” tab located in the top-left corner of the Word window.
 Accessing File Menu in Word
 -
Select “Account”: In the backstage view, find and click on “Account” in the left-hand menu.
-
View Product Information: Under the “Product Information” section, you will see the activation status. If Office is activated, it will state “Product Activated” along with details about your Office 2016 edition. If it’s not activated, it will indicate that activation is required.
3.2. Using Command Prompt (CMD) to Verify Activation
You can also use the Command Prompt (CMD) to check the activation status of your Office 2016. This method provides more detailed information and is useful for troubleshooting.
-
Open Command Prompt as Administrator:
- Press the Windows key, type “cmd,” right-click on “Command Prompt,” and select “Run as administrator.”
-
Navigate to the Office Installation Directory:
-
Type the following command to change the directory to the Office installation folder. The exact path may vary depending on your Office version and installation settings. Here are common paths:
- For 32-bit Office on 64-bit Windows:
cd "C:Program Files (x86)Microsoft OfficeOffice16" - For 64-bit Office on 64-bit Windows:
cd "C:Program FilesMicrosoft OfficeOffice16"
- For 32-bit Office on 64-bit Windows:
-
Press Enter to execute the command.
-
-
Run the Activation Status Command:
- Type the following command and press Enter:
cscript ospp.vbs /dstatus
- Type the following command and press Enter:
-
Review the Output:
- The command will display detailed information about your Office license, including the activation status, license type, and the last five characters of the product key. Look for the “LICENSE STATUS” line; if it says “LICENSE STATUS: —LICENSED—,” your Office is activated.
3.3. Interpreting the Results
After checking the activation status using either Word or CMD, it’s important to understand the results to take appropriate action.
- Product Activated: If the status indicates “Product Activated,” your Office 2016 is fully activated and functioning correctly.
- Activation Required: If the status indicates that activation is required or shows errors related to licensing, you need to proceed with activating your Office 2016.
- Trial Period Expired: If the status shows that the trial period has expired, you must activate Office to continue using it.
- Volume License Issues: If you are using a volume license, the status might show errors related to the Key Management Service (KMS) or other activation methods. Consult your IT administrator for assistance.
4. Activating Office 2016 Using CMD: A Step-by-Step Guide
Activating Office 2016 via Command Prompt (CMD) is a straightforward method that doesn’t require any additional software. This approach uses built-in Windows tools to activate your Office suite, ensuring a safe and efficient process.
4.1. Prerequisites
Before you begin, ensure you have the following:
- Internet Connection: A stable internet connection is required for the activation process.
- Administrator Privileges: You need administrator rights on your computer to execute the commands.
- Office 2016 Installed: Ensure that Microsoft Office 2016 is properly installed on your system.
4.2. Step-by-Step Activation Process
Follow these steps to activate Office 2016 using CMD:
-
Open Command Prompt as Administrator:
-
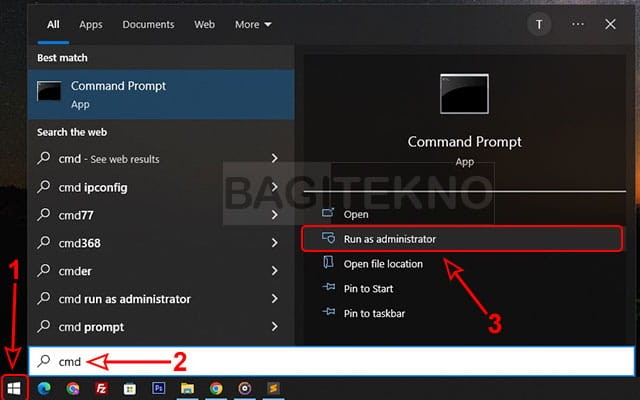
Click on the Start button, type
cmd, right-click on “Command Prompt,” and select “Run as administrator”. -
If prompted by User Account Control (UAC), click “Yes” to allow the application to make changes to your device.
 Opening CMD as Administrator
-
-
Navigate to the Office Installation Directory:
-
Type the following command to change the directory to the Office installation folder. The exact path may vary depending on your Office version and installation settings. Here are common paths:
-
For 32-bit Office on 64-bit Windows:
cd "C:Program Files (x86)Microsoft OfficeOffice16" -
For 64-bit Office on 64-bit Windows:
cd "C:Program FilesMicrosoft OfficeOffice16"
-
-
Press Enter to execute the command.
-
-
Install the Office License:
-
Type the following command and press Enter:
for /f %x in ('dir /b *.dll') do regsvr32 /s %x -
This command registers all the DLL files in the Office directory, which is necessary for activation.
-
-
Install the KMS Client Key:
-
Run the following command to install the KMS client key for your version of Office 2016. Replace
<KMS Client Key>with the appropriate key from the table below:cscript ospp.vbs /inpkey:<KMS Client Key>Office 2016 Edition KMS Client Key Office 2016 Professional Plus XGVPP-NMH47-7TTHJ-W3FW7-8HV2C Office 2016 Standard JNRGM-WHDWX-FJJG3-K47QV-DRTFM Office 2016 Home Business YQJ2R-GWC6P-62WCB-Q3XGB-KBG2G Office 2016 Home and Student X9N2P-PHV3W-BWHG3-KB7WM-M9853 Office 2016 Professional WX4NW-486H8-D76G2-8H42G-KWW8M Office 2016 Visio Professional PD3PC-RHNGV-FXJ29-8JK7D-RJRJK Office 2016 Visio Standard 7WHWN-4QT9G-6D8VG-Y6VTX-2J9EM Office 2016 Project Professional YG9NW-3K39V-2T3HJ-93F3Q-G83KT Office 2016 Project Standard GNFJP-28G5R-3V2XJ-9Q9YD-6PDJ3 -
For example, to install the KMS client key for Office 2016 Professional Plus, the command would be:
cscript ospp.vbs /inpkey:XGVPP-NMH47-7TTHJ-W3FW7-8HV2C
-
-
Set the KMS Server Address:
-
Run the following command to set the Key Management Service (KMS) server address:
cscript ospp.vbs /sethst:kms.msguides.com -
This command points your Office installation to a public KMS server, which will handle the activation.
-
-
Activate Office:
-
Finally, run the activation command:
cscript ospp.vbs /act
-
-
Check Activation Status:
-
To verify that Office 2016 has been successfully activated, run the following command:
cscript ospp.vbs /dstatus -
Review the output to confirm that the license status shows
LICENSE STATUS: ---LICENSED---.
-
4.3. Troubleshooting Common Issues
- Error: “The activation server is unavailable”:
- Ensure you have a stable internet connection.
- Verify that the KMS server address is correctly entered.
- Try a different KMS server if the current one is unresponsive.
- Error: “Access denied”:
- Make sure you are running Command Prompt as an administrator.
- Check if your antivirus or firewall is blocking the activation process.
- Activation Still Failing:
- Double-check the KMS client key for your Office 2016 edition.
- Ensure the Office software is correctly installed.
- Restart your computer and try the activation process again.
5. Activating Office 2016 Using Batch File: A Comprehensive Guide
Using a batch file to activate Office 2016 is another convenient method that automates the activation process. This guide provides a detailed walkthrough to help you create and run a batch file for activating your Office suite.
5.1. Understanding Batch Files
A batch file is a script file that contains a series of commands to be executed by the command-line interpreter. In this context, the batch file automates the steps required to activate Office 2016, making the process easier and less prone to errors.
5.2. Creating the Activation Batch File
Follow these steps to create the batch file:
-
Open a Text Editor:
- Open Notepad or any other text editor on your computer.
-
Enter the Activation Script:
-
Copy and paste the following script into the text editor:
@echo off
title Activate Microsoft Office 2016 (c) Ratiborus

:MODE
cls
echo ============================================================================
echo # Activate Microsoft Office 2016 ALL versions #
echo ============================================================================
echo.
echo # Supported products:
echo - Microsoft Office 2016 Professional Plus
echo - Microsoft Office 2016 Standard
echo.
echo ============================================================================
echo.
echo :: Checking for admin rights
net file 1>nul 2>nul
if '%errorlevel%' == '0' ( echo Administrator rights: TRUE ) else ( echo Administrator rights: FALSE & echo Please run this script as an administrator! & pause & exit )
echo.
echo :: Detecting Office version
for /f "tokens=2 delims==" %%A in ('wmic os get OSArchitecture /value') do set "OSArch=%%A"
if exist "%ProgramFiles%Microsoft OfficeOffice16ospp.vbs" (
    echo Office 2016 64-bit version detected
    cd /d "%ProgramFiles%Microsoft OfficeOffice16"
) else if exist "%ProgramFiles(x86)%Microsoft OfficeOffice16ospp.vbs" (
    echo Office 2016 32-bit version detected
    cd /d "%ProgramFiles(x86)%Microsoft OfficeOffice16"
) else (
    echo Office version not supported!
    pause
    exit
)
echo.
echo :: Installing Office License
for /f %%x in ('dir /b *.dll') do regsvr32 /s %%x
echo.
echo :: Setting KMS server address
cscript ospp.vbs /sethst:kms.msguides.com
echo.
echo :: Activating Office
cscript ospp.vbs /act
echo.
echo :: Checking Activation Status
cscript ospp.vbs /dstatus
echo.
pause
-
-
Save the File:
-
Click on “File” > “Save As”.
-
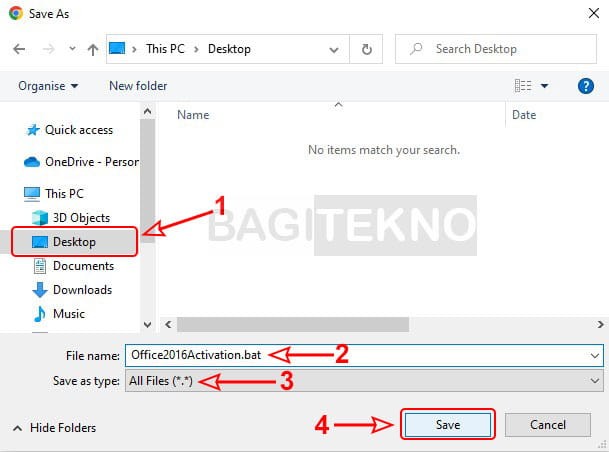
In the “Save As” dialog box, choose “All Files” from the “Save as type” dropdown menu.
-
Name the file
ActivateOffice2016.batand save it to a location you can easily access, such as your Desktop.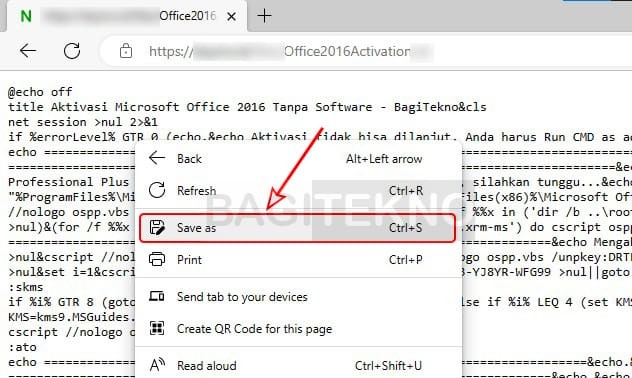 Saving Batch File
-
5.3. Running the Batch File
Follow these steps to run the batch file:
-
Locate the Batch File:
- Find the
ActivateOffice2016.batfile you saved earlier.
- Find the
-
Run as Administrator:
-
Right-click on the batch file and select “Run as administrator”.
 Run as Administrator
 -
If prompted by User Account Control (UAC), click “Yes” to allow the application to make changes to your device.
-
-
Wait for the Process to Complete:
- The batch file will automatically execute the commands, install the license, set the KMS server address, and activate Office.
- Watch the command prompt window to see the progress and any error messages.
-
Check Activation Status:
-
After the batch file completes, it will display the activation status. Look for the line that says
LICENSE STATUS: ---LICENSED---.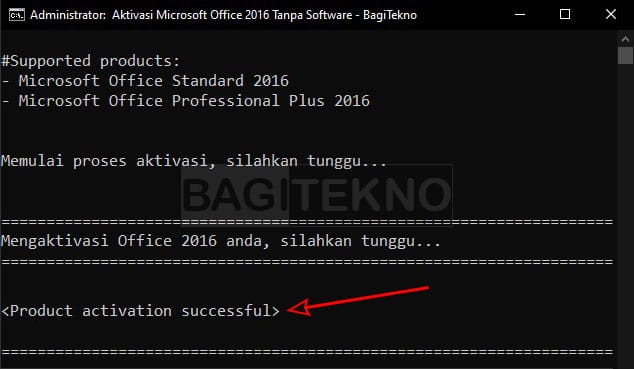 Successful Activation
-
5.4. Customizing the Batch File
You can customize the batch file to suit your specific needs. For example, you can change the KMS server address or add error handling.
- Changing the KMS Server Address:
- Open the batch file in a text editor.
- Find the line
cscript ospp.vbs /sethst:kms.msguides.com. - Replace
kms.msguides.comwith the KMS server address you want to use. - Save the file.
5.5. Troubleshooting Batch File Issues
- Batch File Not Running:
- Make sure you are running the batch file as an administrator.
- Check if your antivirus or firewall is blocking the batch file.
- Errors During Activation:
- Review the command prompt output for specific error messages.
- Ensure your internet connection is stable.
- Verify that the KMS server address is correct.
- Activation Still Failing:
- Double-check the Office version detected by the batch file.
- Ensure the Office software is correctly installed.
- Restart your computer and try running the batch file again.
6. Overcoming Common Activation Errors
Even when following the steps carefully, you might encounter errors during the activation process. This section provides solutions to common activation issues.
6.1. “Windows Script Host Access is Disabled” Error
One of the most common errors when activating Office using CMD or batch files is the “Windows Script Host access is disabled” error. This usually occurs because an application, such as Smadav, is blocking Windows Script Host, which is essential for the activation process.
Solution:
- Identify if Smadav is the Cause:
- If you have Smadav installed, it is likely the cause.
- Allow Windows Script in Smadav:
- Open Smadav.
- Go to the “Settings” or “Advanced” options.
- Find the option to allow or enable Windows Script Host.
- Enable the Windows Script Host option.
- Restart the Activation Process:
- After enabling Windows Script Host in Smadav, try running the activation process again.
6.2. “The Activation Server is Unavailable” Error
This error indicates that your computer is unable to connect to the KMS activation server.
Solution:
- Check Your Internet Connection:
- Ensure you have a stable and active internet connection.
- Verify the KMS Server Address:
- Make sure you have entered the correct KMS server address in the activation command or batch file.
- Try a Different KMS Server:
- If the current KMS server is unresponsive, try using a different public KMS server.
- Firewall and Antivirus Settings:
- Check your firewall and antivirus settings to ensure they are not blocking the connection to the KMS server.
6.3. “Access Denied” Error
This error typically occurs when you do not have the necessary administrative privileges to run the activation commands.
Solution:
- Run Command Prompt as Administrator:
- Always open Command Prompt or run the batch file as an administrator.
- User Account Control (UAC) Settings:
- Ensure that your User Account Control (UAC) settings are not too restrictive.
- Set UAC to a level that prompts you for permission to run administrative tasks.
6.4. Product Key Errors
If you are using a product key and encounter errors, it might be due to entering the key incorrectly or using an invalid key.
Solution:
- Verify the Product Key:
- Double-check the product key to ensure it is entered correctly.
- Use the Correct Key for Your Office Edition:
- Make sure you are using the product key that corresponds to your edition of Office 2016.
- Contact Microsoft Support:
- If you have a valid product key and are still experiencing issues, contact Microsoft support for assistance.
6.5. Activation Still Failing After Troubleshooting
If you have tried all the above solutions and are still unable to activate Office 2016, consider the following:
- Reinstall Office:
- Completely uninstall Office 2016 and then reinstall it.
- Check for Conflicting Software:
- Ensure there are no conflicting software or older versions of Office installed.
- System File Checker (SFC):
- Run the System File Checker tool to repair any corrupted system files.
- Contact Microsoft Support:
- If all else fails, contact Microsoft support for further assistance.
7. Ensuring Permanent Activation
Achieving permanent activation of Microsoft Office 2016 is a goal for many users. While methods involving CMD or batch files often provide activation for a limited period, typically around 180 days, there are ways to manage and maintain this activation to ensure continuous use.
7.1. Understanding Activation Validity
Office 2016 activated through CMD or batch files generally uses a Key Management Service (KMS) server, which grants activation for a specific period. After this period, the activation needs to be renewed.
7.2. Checking the Activation Expiry Date
To ensure continuous use, it’s essential to check the activation expiry date periodically. Here’s how:
- Open Command Prompt as Administrator:
- Right-click on the Start button, type
cmd, right-click on “Command Prompt,” and select “Run as administrator”.
- Right-click on the Start button, type
- Navigate to the Office Installation Directory:
- Type the following command and press Enter:
cd "C:Program Files (x86)Microsoft OfficeOffice16" - Or, if you have the 64-bit version:
cd "C:Program FilesMicrosoft OfficeOffice16"
- Type the following command and press Enter:
- Run the Activation Status Command:
- Type the following command and press Enter:
cscript ospp.vbs /dstatus
- Type the following command and press Enter:
- Review the Output:
- Look for the “REMAINING GRACE” line to see how many days are left before the activation expires.
7.3. Renewing the Activation
To maintain continuous activation, renew the activation before it expires. Here’s how:
- Open Command Prompt as Administrator:
- Follow the steps to open Command Prompt as an administrator.
- Navigate to the Office Installation Directory:
- Type the appropriate command to navigate to the Office installation directory.
- Set the KMS Server Address (if needed):
- If the KMS server address is not already set, use the following command:
cscript ospp.vbs /sethst:kms.msguides.com
- If the KMS server address is not already set, use the following command:
- Activate Office:
- Run the activation command:
cscript ospp.vbs /act
- Run the activation command:
- Check Activation Status:
- Verify that Office 2016 has been successfully reactivated by checking the license status.
7.4. Automating Activation Renewal
To simplify the renewal process, you can create a scheduled task that automatically renews the activation.
- Create a Renewal Script:
- Create a new text file and add the following lines:
@echo off cd /d "%ProgramFiles%Microsoft OfficeOffice16" cscript ospp.vbs /act exit - Save the file as
RenewOfficeActivation.bat.
- Create a new text file and add the following lines:
- Open Task Scheduler:
- Type “Task Scheduler” in the Windows search bar and open the Task Scheduler application.
- Create a Basic Task:
- In the Task Scheduler, click “Create Basic Task” in the right-hand panel.
- Name the Task:
- Enter a name for the task, such as “Renew Office Activation,” and click “Next.”
- Set the Trigger:
- Choose “Daily” or “Weekly” as the trigger to run the task automatically, and click “Next.”
- Set the start date and time, and choose how often you want the task to run.
- Set the Action:
- Choose “Start a program” as the action, and click “Next.”
- Specify the Program:
- Enter
cmd.exeas the program. - Add
/c start "" /min RenewOfficeActivation.batas the arguments. - Click “Next.”
- Enter
- Finish the Task:
- Review the task details and click “Finish” to create the scheduled task.
8. Removing “Get Genuine Office” Notifications
After activating Office 2016, you might still encounter notifications such as “Get Genuine Office” or “Why risk it? Get genuine Office.” These notifications can be disruptive, even though the software is activated. Here’s how to remove them.
8.1. Understanding the Notifications
These notifications are designed to prompt users to purchase a genuine license of Microsoft Office. Even if you have activated Office through KMS or other methods, these messages can still appear.
8.2. Method 1: Editing the Registry
One way to remove these notifications is by editing the Windows Registry.
Warning: Editing the registry can be risky if not done correctly. Make sure to back up your registry before proceeding.
- Open Registry Editor:
- Press
Windows + R, typeregedit, and press Enter. - If prompted by User Account Control (UAC), click “Yes.”
- Press
- Navigate to the Office Registry Key:
- Navigate to the following key:
HKEY_LOCAL_MACHINESOFTWAREMicrosoftOffice16.0CommonOEM - If the
OEMkey does not exist, you may need to create it. Right-click onCommon, selectNew, thenKey, and name itOEM.
- Navigate to the following key:
- Create or Modify the “Value” DWORD:
- In the
OEMkey, right-click in the right-hand panel, selectNew, and thenDWORD (32-bit) Value. - Name the new DWORD
Value. - Double-click the
ValueDWORD and set its value to1.
- In the
- Restart Your Computer:
- Restart your computer for the changes to take effect.
8.3. Method 2: Using Task Scheduler
Another method involves disabling specific tasks in Task Scheduler that are responsible for displaying these notifications.
- Open Task Scheduler:
- Type “Task Scheduler” in the Windows search bar and open the Task Scheduler application.
- Navigate to Office Tasks:
- In the Task Scheduler, navigate to
Task Scheduler Library>Microsoft>Office.
- In the Task Scheduler, navigate to
- Disable OfficeC2RClientTask:
- Locate the task named
OfficeC2RClientTask. - Right-click on the task and select
Disable.
- Locate the task named
- Disable Office Subscription Management:
- Look for any tasks related to Office subscription management or notifications.
- Disable these tasks as well.
- Restart Your Computer:
- Restart your computer to ensure the changes take effect.
8.4. Method 3: Deleting or Renaming the Office Notification File
This method involves locating and either deleting or renaming the file responsible for the notifications.
-
Open File Explorer:
-
Open File Explorer and navigate to the Office installation directory.
-
The exact path may vary depending on your Office version and installation settings. Here are common paths:
-
For 32-bit Office on 64-bit Windows:
C:Program Files (x86)Microsoft OfficeOffice16 -
For 64-bit Office on 64-bit Windows:
C:Program FilesMicrosoft OfficeOffice16
-
-
-
Locate the Notification File:
- Look for a file named
OfficeNotificationClient.exeor similar.
- Look for a file named
-
Rename or Delete the File:
- Right-click on the file and select
Rename. Rename it toOfficeNotificationClient.exe.old. - Alternatively, you can delete the file, but make sure to create a backup first.
- Right-click on the file and select
-
Restart Your Computer:
- Restart your computer for the changes to take effect.
8.5. Considerations
- Reverting Changes:
- If you encounter any issues after applying these methods, you can revert the changes by undoing the registry edits, re-enabling the tasks in Task Scheduler, or restoring the original file.
- Updates:
- Keep in mind that future Office updates might reintroduce these notifications. You may need to repeat these steps after applying updates.
- Legitimacy:
- These methods are intended for users who have activated Office through legitimate means but are still experiencing unwanted notifications.
9. The Role of CAR-REMOTE-REPAIR.EDU.VN in Automotive Technology
At CAR-REMOTE-REPAIR.EDU.VN, we are committed to advancing automotive technology through specialized training and remote support services. Our mission is to equip automotive technicians with the knowledge and tools they need to excel in an increasingly complex industry.
9.1. Specialized Training Programs
We offer a range of training programs designed to cover the latest advancements in automotive diagnostics and repair. These programs include:
- Remote Diagnostics Training: Learn how to diagnose vehicle issues remotely using advanced diagnostic tools and software.
- Advanced Electronics Training: Gain expertise in automotive electronics, including ECU programming, sensor calibration, and wiring harness repair.
- Electric Vehicle (EV) Training: Master the skills needed to service and repair electric vehicles, covering battery management, motor control, and charging systems.
- ADAS Calibration Training: Understand and calibrate Advanced Driver Assistance Systems (ADAS), ensuring the safety and functionality of modern vehicles.
Our training programs are designed to be accessible to technicians of all skill levels, from those just starting out to experienced professionals looking to upgrade their skills.
9.2. Remote Support Services
In addition to training, we provide remote support services to help technicians tackle complex diagnostic and repair challenges. Our services include:
- Remote Diagnostics Assistance: Get real-time support from experienced technicians who can remotely access vehicle systems and provide diagnostic guidance.
- ECU Programming and Coding: Access remote ECU programming and coding services to update vehicle software and resolve performance issues.
- Technical Troubleshooting: Receive expert assistance in troubleshooting complex automotive issues, including electrical problems, engine performance, and transmission issues.
- Software and Tool Support: Get help with using diagnostic software and tools, including setup, configuration, and troubleshooting.
Our remote support services are available on-demand, providing technicians with the help they need, when they need it.
9.3. Benefits of Our Services
By leveraging our training and remote support services, automotive technicians can:
- Enhance Skills and Knowledge: Stay up-to-date with the latest automotive technologies and best practices.
- Improve Diagnostic Accuracy: Accurately diagnose and repair complex vehicle issues, reducing the risk of misdiagnosis and costly repairs.
- Increase Efficiency: Streamline the repair process and reduce downtime by leveraging remote support and expert guidance.
- Expand Service Offerings: Offer a wider range of services, including advanced diagnostics, ECU programming, and ADAS calibration.
9.4. Commitment to Excellence
At CAR-REMOTE-REPAIR.EDU.VN, we are committed to excellence in everything we do. Our training programs are developed by industry experts and delivered using the latest instructional techniques. Our remote support services are staffed by experienced technicians who are passionate about helping others succeed.
9.5. Contact Us
Ready to take your automotive skills to the next level? Contact us today to learn more about our training programs and remote support services.
Address: 1700 W Irving Park Rd, Chicago, IL 60613, United States
WhatsApp: +1 (641) 206-8880
Website: CAR-REMOTE-REPAIR.EDU.VN
10. FAQs: Activating Office 2016 Without Software
10.1. Is it legal to activate Office 2016 without a product key?
Activating Office 2016 without a valid product key may violate Microsoft’s licensing terms. It is recommended to use a genuine product key for legal and ethical reasons.
10.2. Can I use the CMD method on all versions of Windows?
Yes, the CMD activation method can be used on most versions of Windows, including Windows 7, Windows 8, Windows 10, and Windows 11.
10.3. How long does the activation last when using the CMD method?
The activation typically lasts for 180 days. After this period, you will need to renew the activation.
10.4. Is it safe to use batch files for Office activation?
Using batch files for activation can be safe if the script is from a trusted source. Always review the contents of the batch file before running it to ensure it does not contain any malicious commands.
10.5. What should I do if the KMS server is not working?
If the KMS server is not working, try using a different KMS server or check your internet connection. Ensure that your firewall is not blocking the connection to the KMS server.
10.6. Can I activate Office 2016 without an internet connection?
No, the methods described in this