Are you struggling with how to fix corrupted videos without software? CAR-REMOTE-REPAIR.EDU.VN offers a comprehensive guide to help you understand the primary causes of video corruption and provides practical, software-free methods to recover your valuable video files, including using command prompts and specialized repair services. Explore efficient methods for video recovery and ensure your data is safe. Enhance your automotive repair skills with cutting-edge remote diagnostic techniques.
Contents
- 1. Understanding Video Corruption: Why Do Videos Get Corrupted?
- 1.1. Hardware-Related Issues
- 1.1.1. Storage Device Failure
- 1.1.2. Data Transfer Errors
- 1.2. Software-Related Issues
- 1.2.1. Video Editing Software Problems
- 1.2.2. Codec Incompatibilities
- 1.3. User Errors
- 1.3.1. Improper File Handling
- 1.3.2. Lack of Maintenance
- 2. Initial Steps Before Trying to Fix Corrupted Videos
- 2.1. Check the Playback Device
- 2.2. Verify the Codec
- 2.3. File Integrity Check
- 3. Repairing Corrupted Videos Using Command Prompt (Windows)
- 3.1. Understanding CHKDSK
- 3.2. Running CHKDSK on Your Drive
- 3.3. Interpreting CHKDSK Results
- 4. Using VLC Media Player for Video Repair
- 4.1. VLC’s Repair Capabilities
- 4.2. Setting Up VLC for Repair
- 4.3. Playing the Corrupted Video
- 5. Converting the Video to a Different Format
- 5.1. Understanding Video Conversion
- 5.2. Choosing a Conversion Tool
- 5.3. Converting the Video Using HandBrake
- 6. Restoring from Backup
- 6.1. Importance of Regular Backups
- 6.2. Types of Backups
- 6.3. Restoring Your Video from Backup
- 7. Prevention Tips to Avoid Video Corruption
- 7.1. Use Reliable Hardware
- 7.2. Proper Handling of Video Files
- 7.3. Regular System Maintenance
- 8. When to Seek Professional Help
- 8.1. Signs of Severe Corruption
- 8.2. Choosing a Data Recovery Service
- 8.3. The Data Recovery Process
- 9. Advanced Techniques for Video Repair
- 9.1. Hex Editing
- 9.2. Rebuilding the Index
- 9.3. Using FFmpeg for Advanced Repair
- 10. Case Studies: Real-Life Video Repair Scenarios
- 10.1. Recovering a Corrupted Wedding Video
- 10.2. Fixing a Corrupted GoPro Recording
- 10.3. Recovering a Corrupted Drone Video
- Comprehensive Training Programs
- Cutting-Edge Solutions
- Why Choose CAR-REMOTE-REPAIR.EDU.VN?
- FAQ: How to Fix Corrupted Videos Without Software
- Q1: Can a corrupted video be fixed without software?
- Q2: What causes video corruption?
1. Understanding Video Corruption: Why Do Videos Get Corrupted?
Video corruption occurs due to various reasons, which can be broadly categorized into hardware issues, software glitches, and user errors. Understanding these causes is the first step in learning how to fix corrupted videos without software.
1.1. Hardware-Related Issues
Hardware issues are a common culprit behind video corruption. These problems often arise from faulty storage devices or issues during data transfer.
1.1.1. Storage Device Failure
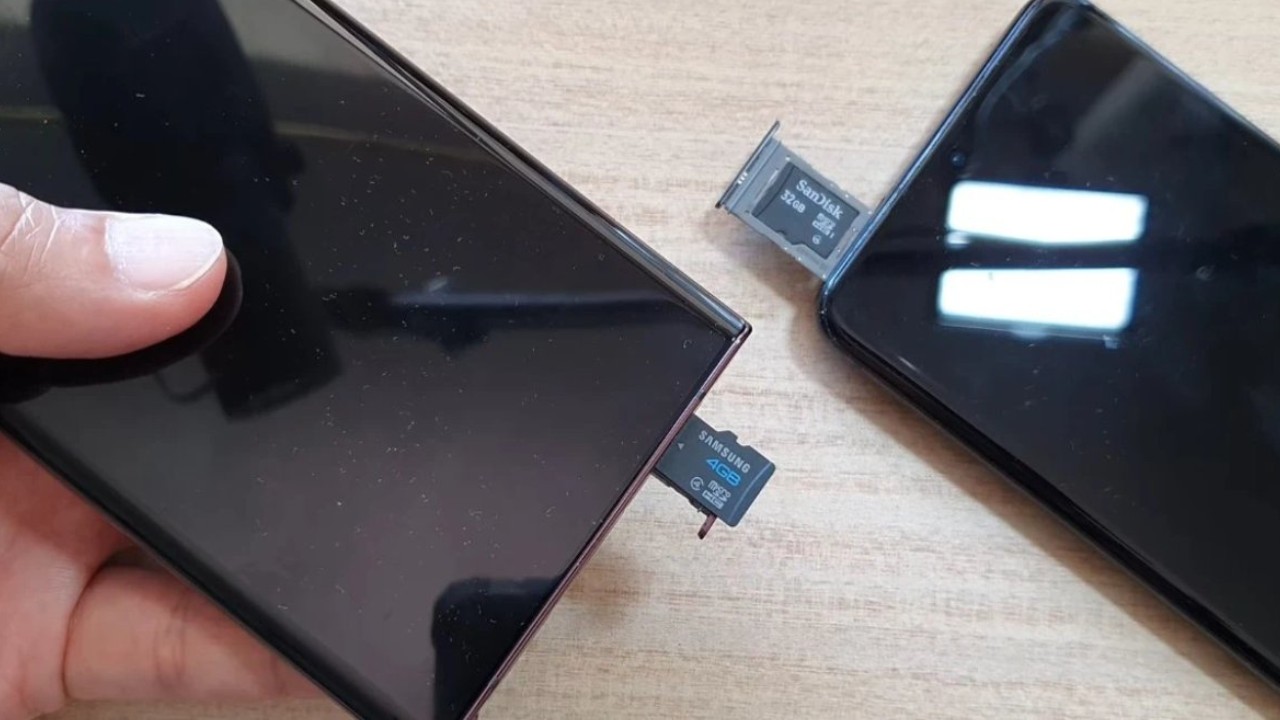
Storage devices, such as hard drives, solid-state drives (SSDs), and SD cards, have a limited lifespan. As they age, they can develop bad sectors or complete failures, leading to data corruption.
-
Hard Drives: Mechanical hard drives are particularly susceptible to physical damage. A head crash, where the read/write head comes into contact with the platter, can cause widespread data corruption.
-
SSDs: While SSDs are more resistant to physical shock, they can still fail due to wear and tear on their memory chips. Over time, the write cycles on these chips degrade, leading to data loss.
-
SD Cards: SD cards are commonly used in cameras and other portable devices. They are prone to corruption due to frequent insertion and removal, exposure to extreme temperatures, and physical damage.
1.1.2. Data Transfer Errors
Errors during data transfer can also corrupt video files. This can happen when transferring videos from one device to another or when saving videos to a storage device.
-
Interrupted Transfers: If a data transfer is interrupted, for example, by disconnecting a USB drive prematurely, the video file may not be fully written, resulting in corruption.
-
USB Port Issues: Faulty USB ports can cause intermittent disconnections and data transfer errors. Always ensure that your USB ports are functioning correctly and that the cable is securely connected.
-
Network Issues: When transferring videos over a network, interruptions or weak connections can lead to corrupted files. A stable and reliable network connection is crucial for successful video transfers.
1.2. Software-Related Issues
Software glitches and errors in video processing can also lead to corruption. These issues often involve problems with video editing software, codecs, or the operating system itself.
1.2.1. Video Editing Software Problems
Video editing software can sometimes introduce errors during the editing or rendering process. This can result in corrupted video files that are unplayable or contain glitches.
-
Software Bugs: Bugs in the video editing software can cause unexpected errors and corrupt the video file. Regularly updating your software can help mitigate these issues.
-
Rendering Errors: Rendering is a resource-intensive process that can sometimes fail, especially if the computer lacks sufficient processing power or memory. These failures can lead to corrupted video files.
-
Codec Issues: Incompatible or outdated codecs can also cause video corruption. Codecs are used to encode and decode video files, and if the correct codec is not available, the video may not play properly.
1.2.2. Codec Incompatibilities
Codecs play a critical role in video playback. When the codec used to encode a video is not compatible with the player or the system, the video may become corrupted or unplayable.
-
Missing Codecs: If a required codec is missing from your system, the video player will be unable to decode the video file, resulting in playback errors or corruption.
-
Outdated Codecs: Using outdated codecs can also cause problems. Codecs are constantly updated to improve performance and fix bugs, so keeping them current is essential.
-
Conflicting Codecs: Sometimes, multiple codecs installed on the same system can conflict with each other, leading to video corruption. Resolving these conflicts may require uninstalling and reinstalling codecs.
1.3. User Errors
User errors, such as improper handling of video files and neglecting maintenance, can also contribute to video corruption.
1.3.1. Improper File Handling
Improper handling of video files, such as abruptly stopping a recording or editing session, can lead to corruption. Always ensure that video files are properly saved and closed before taking any action.
-
Sudden Interruptions: Interrupting a video recording or editing session without properly saving the file can result in incomplete or corrupted data.
-
Incorrect File Conversions: Converting video files to different formats using unreliable software can sometimes lead to corruption. Always use trusted and reputable conversion tools.
-
Accidental Deletion: Accidentally deleting video files and then attempting to recover them can sometimes lead to corruption, especially if the recovery process is not handled correctly.
1.3.2. Lack of Maintenance
Neglecting maintenance tasks, such as defragmenting hard drives and running virus scans, can also contribute to video corruption over time.
-
Disk Fragmentation: Over time, files on a hard drive can become fragmented, which can slow down performance and increase the risk of data corruption. Regularly defragmenting the drive can help prevent this.
-
Malware Infections: Malware, such as viruses and ransomware, can corrupt video files and other data on your system. Regularly scanning your computer with a reputable antivirus program is essential.
-
System Errors: Operating system errors can also lead to video corruption. Keeping your operating system up to date with the latest patches and updates can help prevent these issues.
Understanding these common causes of video corruption is crucial for taking preventive measures and implementing effective recovery strategies. By addressing hardware issues, resolving software glitches, and avoiding user errors, you can minimize the risk of losing your valuable video files.
 Understanding the causes of video corruption
2. Initial Steps Before Trying to Fix Corrupted Videos
Before diving into complex solutions, it’s important to undertake a few preliminary steps. These initial checks can often resolve minor issues without needing advanced methods on how to fix corrupted videos without software.
2.1. Check the Playback Device
Sometimes, the issue isn’t with the video file itself, but with the device you’re using to play it. Compatibility issues or outdated software can cause playback errors that mimic video corruption.
- Try a Different Player: Different video players use different codecs and have varying levels of compatibility. Try playing the video in VLC Media Player, which supports a wide range of formats and codecs. If the video plays correctly in VLC, the problem likely lies with your original player.
- Update Your Video Player: Outdated video players may not support newer video formats or codecs. Ensure your player is up to date to handle the latest video technologies.
- Test on Another Device: Play the video on a different computer, smartphone, or tablet. This will help you determine whether the issue is specific to your device or if the video file is genuinely corrupted.
2.2. Verify the Codec
Codecs are essential for encoding and decoding video files. If the necessary codec is missing or outdated, the video may not play correctly.
- Identify the Codec: Use a media information tool like MediaInfo to identify the codec used to encode the video file. This tool provides detailed information about the video and audio streams, including the codecs used.
- Install Missing Codecs: Once you’ve identified the codec, search online for the necessary codec pack. Popular codec packs include K-Lite Codec Pack and Combined Community Codec Pack.
- Update Existing Codecs: If you already have the codec installed, ensure it’s the latest version. Outdated codecs can sometimes cause compatibility issues.
2.3. File Integrity Check
Before assuming the video is corrupted, check the file’s integrity. A partially downloaded or transferred file can appear corrupted even if it’s not.
- Verify File Size: Compare the file size of the video with the original source. If the file size is significantly smaller, it may indicate that the file was not fully downloaded or transferred.
- Redownload the Video: If the video was downloaded from the internet, try downloading it again. Ensure the download is complete and uninterrupted.
- Re-transfer the File: If the video was transferred from another device, re-transfer the file. Use a reliable method, such as a USB drive or a stable network connection, to ensure the transfer is successful.
By performing these initial checks, you can often rule out simple issues and focus on more advanced solutions for how to fix corrupted videos without software. These steps are crucial for accurately diagnosing the problem and preventing unnecessary troubleshooting.
3. Repairing Corrupted Videos Using Command Prompt (Windows)
The Command Prompt in Windows offers a powerful way to fix file system errors that may cause video corruption. This method, which shows you how to fix corrupted videos without software, involves using the chkdsk command to scan and repair disk errors.
3.1. Understanding CHKDSK
CHKDSK (Check Disk) is a system tool in Windows that verifies the file system integrity of a volume and fixes logical file system errors. It can identify and repair issues like bad sectors, lost clusters, and directory errors, which can contribute to video corruption.
- How CHKDSK Works: CHKDSK scans the file system metadata to identify inconsistencies. When it finds an error, it attempts to repair it, restoring the file system to a consistent state.
- Benefits of Using CHKDSK:
- Fixes file system errors
- Recovers readable information from bad sectors
- Helps prevent further data corruption
- Limitations: CHKDSK can only fix logical file system errors. It cannot repair physical damage to the storage device.
3.2. Running CHKDSK on Your Drive
To run CHKDSK, you need to open Command Prompt with administrative privileges. This ensures that CHKDSK has the necessary permissions to make changes to the file system.
- Open Command Prompt as Administrator:
- Press the Windows key, type “cmd,” right-click on “Command Prompt,” and select “Run as administrator.”
- Click “Yes” if prompted by User Account Control.
- Identify the Drive Letter: Determine the drive letter assigned to the storage device containing the corrupted video. You can find this in File Explorer.
- Run the CHKDSK Command: Type the following command and press Enter:
chkdsk X: /f /r /x- Replace “X” with the drive letter of your storage device.
/f: Fixes errors on the disk./r: Locates bad sectors and recovers readable information./x: Forces the volume to dismount first, if necessary.
- Wait for the Process to Complete: CHKDSK will scan the drive and attempt to fix any errors it finds. This process can take a significant amount of time, depending on the size of the drive and the number of errors.
- Restart Your Computer: Once CHKDSK is complete, restart your computer to ensure all changes are applied.
3.3. Interpreting CHKDSK Results
After CHKDSK finishes, it will display a summary of the results. This summary provides information about the total disk space, the number of files and directories, and any errors that were found and fixed.
- Successful Repair: If CHKDSK successfully fixed errors, the summary will indicate that the file system is now clean. You can then try playing the corrupted video file to see if it has been repaired.
- Unsuccessful Repair: If CHKDSK was unable to fix the errors or if it found unrecoverable bad sectors, the video file may be permanently corrupted. In this case, you may need to consider other recovery methods, such as professional data recovery services.
Running CHKDSK is a valuable step in learning how to fix corrupted videos without software. It can often resolve file system errors that cause video corruption, restoring your video files to a playable state.
4. Using VLC Media Player for Video Repair
VLC Media Player is not just a versatile video player; it also has built-in features to repair corrupted AVI files. This method offers a straightforward solution for how to fix corrupted videos without software.
4.1. VLC’s Repair Capabilities
VLC Media Player can detect and repair minor corruptions in AVI files. While it may not fix severely damaged videos, it’s worth trying for quick fixes.
- Why VLC Works: VLC uses its decoding capabilities to bypass errors and play as much of the video as possible. It also attempts to repair index errors, which can cause playback issues.
- File Types Supported: VLC primarily repairs AVI files. Other file types may not be effectively repaired using this method.
- Limitations: VLC’s repair function is basic. It may not work for heavily corrupted files or files with complex encoding issues.
4.2. Setting Up VLC for Repair
To enable VLC’s repair feature, you need to adjust a setting in the preferences.
- Open VLC Media Player: Launch VLC on your computer.
- Go to Preferences:
- Click on “Tools” in the menu bar and select “Preferences.”
- Alternatively, press Ctrl+P to open the Preferences window.
- Show All Settings:
- In the Preferences window, click on “All” in the “Show settings” section at the bottom.
- Navigate to AVI Codec Settings:
- In the Advanced Preferences, navigate to “Input / Codecs” > “Video codecs” > “FFmpeg.”
- Change the “Repair AVI files” Setting:
- Find the option labeled “Repair AVI files.”
- Select “Always fix” from the dropdown menu.
- Save the Settings:
- Click “Save” to apply the changes.
- Close and reopen VLC Media Player for the settings to take effect.
4.3. Playing the Corrupted Video
After configuring VLC for repair, try playing the corrupted video file.
- Open the Video:
- Click on “Media” in the menu bar and select “Open File.”
- Navigate to the corrupted video file and select it.
- Click “Open” to start playing the video.
- VLC Attempts Repair:
- VLC will attempt to repair the video while playing it. You may notice some glitches or skips during playback, which is normal.
- Check the Playback:
- After the video plays, check if the corruption issues have been resolved. The video may now play smoothly without errors.
- Manual Repair (If Needed):
- If VLC cannot repair the video automatically, it may prompt you to manually repair the file. Follow the on-screen instructions to attempt a manual repair.
Using VLC Media Player for video repair is a simple and effective way to address minor corruptions without resorting to specialized software. It’s a valuable tool in your arsenal for how to fix corrupted videos without software.
5. Converting the Video to a Different Format
Sometimes, converting a corrupted video to a different format can resolve playback issues. This method, which shows you how to fix corrupted videos without software, can bypass encoding errors and make the video playable again.
5.1. Understanding Video Conversion
Video conversion involves changing the format of a video file from one type to another (e.g., from MP4 to AVI). This process re-encodes the video, which can sometimes fix minor corruptions in the original file.
- Why Conversion Works: Conversion can correct errors in the original encoding or address codec incompatibilities. By re-encoding the video, you create a new file with potentially fewer issues.
- Suitable File Types: This method works best with common video formats like MP4, AVI, MOV, and WMV.
- Limitations: Conversion may not fix severe corruptions or damage to the video’s content.
5.2. Choosing a Conversion Tool
Several free and paid video conversion tools are available. For this method, we’ll focus on using HandBrake, a free and open-source video transcoder.
- HandBrake Features:
- Supports a wide range of video formats
- Offers customizable encoding settings
- Provides a user-friendly interface
- Available for Windows, macOS, and Linux
- Other Conversion Tools:
- VLC Media Player (also capable of video conversion)
- Freemake Video Converter
- Any Video Converter
5.3. Converting the Video Using HandBrake
- Download and Install HandBrake:
- Visit the HandBrake website and download the appropriate version for your operating system.
- Install HandBrake following the on-screen instructions.
- Open HandBrake:
- Launch HandBrake on your computer.
- Load the Corrupted Video:
- Click on “File” or “Folder” to select the corrupted video file.
- HandBrake will scan the video file to prepare it for conversion.
- Choose a Preset:
- Select a preset from the right-hand panel. Common presets include “Fast 1080p30” or “Web Optimized.”
- You can also customize the settings manually by adjusting the video codec, resolution, and frame rate.
- Specify the Output File:
- Click on “Browse” to choose a location to save the converted video file.
- Give the file a new name and ensure it has a valid file extension (e.g., .mp4).
- Start the Conversion:
- Click on “Start Encode” to begin the conversion process.
- HandBrake will display a progress bar showing the status of the conversion.
- Wait for the Conversion to Complete:
- The conversion time depends on the video’s length and the settings you’ve chosen.
- Once the conversion is complete, HandBrake will notify you.
- Play the Converted Video:
- Open the converted video file with your preferred video player.
- Check if the corruption issues have been resolved.
Converting a video to a different format can often fix minor corruption issues by re-encoding the video stream. This method is a valuable addition to your toolkit for how to fix corrupted videos without software.
6. Restoring from Backup
If you’ve been diligent about backing up your data, restoring from a backup is the most reliable way to recover corrupted videos. This method ensures you get a clean, uncorrupted version of your file, demonstrating how to fix corrupted videos without software issues.
6.1. Importance of Regular Backups
Regular backups are crucial for protecting your data against loss or corruption. Having a recent backup can save you time and effort when dealing with corrupted video files.
- Data Protection: Backups provide a safety net in case of hardware failure, software errors, or user mistakes.
- Time Savings: Restoring from a backup is often faster and more reliable than attempting to repair corrupted files.
- Peace of Mind: Knowing that your data is backed up gives you peace of mind, knowing that you can recover from unexpected issues.
6.2. Types of Backups
There are several types of backups you can use, each with its own advantages and disadvantages.
- Local Backups:
- Store backups on a local storage device, such as an external hard drive or a network-attached storage (NAS) device.
- Advantages: Fast and easy to access.
- Disadvantages: Vulnerable to physical damage or theft.
- Cloud Backups:
- Store backups on a cloud service, such as Google Drive, Dropbox, or Backblaze.
- Advantages: Offsite storage protects against physical damage, accessible from anywhere.
- Disadvantages: Requires an internet connection, may have storage limits.
- Hybrid Backups:
- Combine local and cloud backups for added redundancy.
- Advantages: Combines the speed of local backups with the offsite protection of cloud backups.
- Disadvantages: Requires managing multiple backup locations.
6.3. Restoring Your Video from Backup
The process of restoring a video from backup depends on the type of backup you’re using.
- Local Backup:
- Connect the external hard drive or NAS device to your computer.
- Navigate to the backup location.
- Locate the video file you want to restore.
- Copy the video file to your desired location on your computer.
- Cloud Backup:
- Log in to your cloud storage account.
- Navigate to the backup location.
- Locate the video file you want to restore.
- Download the video file to your computer.
- Verify the Restored Video:
- Open the restored video file with your preferred video player.
- Check if the corruption issues have been resolved.
Restoring from a backup is the most reliable method for recovering corrupted videos, provided you have a recent and complete backup available. This strategy is key for how to fix corrupted videos without software issues and ensures minimal data loss.
7. Prevention Tips to Avoid Video Corruption
Preventing video corruption is better than trying to fix it. Implementing a few preventive measures can save you time and frustration in the long run. These tips focus on how to fix corrupted videos without software problems by avoiding the issue altogether.
7.1. Use Reliable Hardware
Using high-quality hardware can reduce the risk of video corruption caused by hardware failures.
- High-Quality Storage Devices:
- Invest in reputable brands and models of hard drives, SSDs, and SD cards.
- Avoid using cheap or generic storage devices, as they are more prone to failure.
- Stable Power Supply:
- Use a reliable power supply unit (PSU) to prevent power surges or voltage fluctuations that can damage storage devices.
- Consider using a uninterruptible power supply (UPS) to provide backup power in case of a power outage.
- Proper Cabling:
- Use high-quality cables for connecting storage devices to your computer.
- Ensure that cables are securely connected to prevent intermittent disconnections.
7.2. Proper Handling of Video Files
Handling video files with care can prevent corruption caused by user errors.
- Safe Ejection of Storage Devices:
- Always use the “Safely Remove Hardware” option before disconnecting external storage devices.
- This ensures that all data has been written to the device and prevents data corruption.
- Avoid Interrupting Transfers:
- Do not interrupt video transfers or recordings until they are complete.
- Ensure that your computer has enough battery power to prevent unexpected shutdowns during transfers.
- Use Reliable Software:
- Use reputable video editing and conversion software to minimize the risk of introducing errors.
- Keep your software up to date to benefit from bug fixes and performance improvements.
7.3. Regular System Maintenance
Performing regular system maintenance can help prevent video corruption caused by software issues.
- Run Regular Virus Scans:
- Use a reputable antivirus program to scan your computer for malware.
- Schedule regular scans to detect and remove threats before they can cause damage.
- Keep Your Operating System Updated:
- Install the latest updates and patches for your operating system.
- These updates often include bug fixes and security improvements that can prevent data corruption.
- Defragment Your Hard Drive:
- Defragment your hard drive regularly to improve performance and reduce the risk of data corruption.
- Use the built-in Disk Defragmenter tool in Windows or a third-party defragmentation program.
- Monitor Disk Health:
- Use disk monitoring tools to check the health of your storage devices.
- These tools can alert you to potential problems before they lead to data loss.
By implementing these prevention tips, you can significantly reduce the risk of video corruption and protect your valuable video files. These proactive measures are essential for how to fix corrupted videos without software problems and ensure your data remains safe and accessible.
8. When to Seek Professional Help
While many video corruption issues can be resolved with DIY methods, some situations require professional help. Knowing when to seek professional assistance can save you time and prevent further damage to your data.
8.1. Signs of Severe Corruption
Recognizing the signs of severe video corruption is crucial for making an informed decision about seeking professional help.
- Physical Damage: If the storage device has suffered physical damage, such as being dropped or exposed to water, professional data recovery is likely necessary.
- Consistent Errors: If the video file consistently produces errors even after trying multiple repair methods, it may be severely corrupted.
- Inability to Access the Drive: If you are unable to access the storage device at all, it may indicate a serious hardware or file system issue.
- Overwritten Data: If you have accidentally overwritten the video file with new data, professional recovery may be the only option.
8.2. Choosing a Data Recovery Service
If you decide to seek professional help, choosing a reputable data recovery service is essential.
- Research and Reviews:
- Look for data recovery services with positive reviews and testimonials.
- Check online forums and review sites for feedback from previous customers.
- Experience and Expertise:
- Choose a service with extensive experience in video file recovery.
- Ensure that the service has the necessary tools and expertise to handle your specific type of storage device and file format.
- Data Security:
- Verify that the service has strict data security policies to protect your privacy.
- Ask about their data handling procedures and security measures.
- Cost and Estimates:
- Get a clear estimate of the cost of the recovery service.
- Be wary of services that offer unrealistic or overly optimistic promises.
- Success Rate:
- Ask about the service’s success rate for video file recovery.
- Keep in mind that success rates can vary depending on the severity of the corruption and the type of storage device.
8.3. The Data Recovery Process
Understanding the data recovery process can help you manage your expectations and prepare for the recovery.
- Initial Assessment:
- The data recovery service will assess the storage device and the extent of the damage.
- They will provide you with a report outlining the potential for recovery and the estimated cost.
- Data Recovery:
- The service will use specialized tools and techniques to recover the video file.
- This may involve repairing the file system, extracting data from damaged sectors, or rebuilding the file structure.
- Verification:
- After the recovery, the service will verify that the video file is playable and that the recovered data is accurate.
- Delivery:
- The recovered video file will be delivered to you on a new storage device or via a secure online transfer.
Knowing when to seek professional help is crucial for maximizing your chances of recovering severely corrupted videos. While DIY methods can be effective for minor issues, professional data recovery services offer the expertise and tools needed to handle more complex cases.
9. Advanced Techniques for Video Repair
When standard methods fail, advanced techniques might offer a solution for how to fix corrupted videos without software, though they often require a deeper understanding of video file structures.
9.1. Hex Editing
Hex editing involves examining and modifying the raw data of a video file. This technique can be used to repair minor corruptions by manually correcting errors in the file’s structure.
- What is Hex Editing?
- Hex editors display the contents of a file as hexadecimal code, allowing you to view and modify the individual bytes.
- This requires a good understanding of file formats and data structures.
- When to Use Hex Editing:
- Hex editing is useful for fixing minor errors in the header or metadata of a video file.
- It can also be used to repair small sections of corrupted data.
- Tools for Hex Editing:
- HxD (Windows)
- Hex Fiend (macOS)
- Bless (Linux)
9.2. Rebuilding the Index
The index of a video file contains information about the location of frames and other data within the file. If the index is corrupted, the video may not play correctly. Rebuilding the index can sometimes fix this issue.
- What is the Index?
- The index allows the video player to quickly navigate to specific parts of the video.
- A corrupted index can cause playback errors, such as skipping or freezing.
- How to Rebuild the Index:
- Some video players, like VLC, have built-in features to rebuild the index.
- You can also use specialized tools like DivFix++ to rebuild the index of AVI files.
9.3. Using FFmpeg for Advanced Repair
FFmpeg is a powerful command-line tool for video and audio processing. It can be used for a variety of advanced repair tasks, such as re-encoding corrupted files and extracting data from damaged streams.
- What is FFmpeg?
- FFmpeg is a free and open-source multimedia framework.
- It can be used for encoding, decoding, transcoding, muxing, demuxing, streaming, and filtering video and audio files.
- How to Use FFmpeg for Repair:
- Re-encoding: Use FFmpeg to re-encode a corrupted video file to a new format. This can often fix minor corruptions in the original encoding.
- Extracting Data: Use FFmpeg to extract audio and video streams from a damaged file. You can then combine these streams into a new, playable file.
- Fixing Timestamps: Use FFmpeg to correct timestamp errors in the video stream, which can cause synchronization issues.
Advanced techniques like hex editing, rebuilding the index, and using FFmpeg can be effective for repairing severely corrupted videos. However, these methods require a high level of technical expertise and should only be attempted by experienced users.
10. Case Studies: Real-Life Video Repair Scenarios
Examining real-life video repair scenarios can provide valuable insights into how to effectively troubleshoot and fix corrupted video files.
10.1. Recovering a Corrupted Wedding Video
- Scenario: A couple’s wedding video was corrupted due to a faulty SD card. The video would play for a few seconds and then freeze.
- Troubleshooting Steps:
- Checked the Playback Device: The video played correctly on some devices but not on others, indicating a codec issue.
- Verified the Codec: The video used the H.264 codec. Installing the latest version of the codec resolved the issue on most devices.
- Used VLC for Repair: VLC was used to repair the video, which fixed some minor index errors.
- Converted the Video: The video was converted to MP4 using HandBrake. This fixed the remaining playback issues.
- Outcome: The wedding video was successfully recovered, allowing the couple to relive their special day.
10.2. Fixing a Corrupted GoPro Recording
- Scenario: A GoPro recording was corrupted after the camera’s battery died during recording. The video file was unplayable.
- Troubleshooting Steps:
- Checked the File Size: The file size was significantly smaller than expected, indicating that the recording was incomplete.
- Used CHKDSK: CHKDSK was run on the SD card to fix file system errors. This recovered some of the missing data.
- Used FFmpeg: FFmpeg was used to extract the audio and video streams from the damaged file. The streams were then combined into a new, playable file.
- Outcome: While some of the recording was lost, most of the video was successfully recovered, allowing the user to salvage their footage.
10.3. Recovering a Corrupted Drone Video
- Scenario: A drone video was corrupted during transfer from the drone to a computer. The video file would not open.
- Troubleshooting Steps:
- Re-transferred the File: The video file was re-transferred from the drone to the computer using a different USB cable.
- Used a Hex Editor: A hex editor was used to examine the file’s header. The header was found to be corrupted and was manually repaired.
- Used Professional Help: Since the problem was beyond simple fixes, a professional video recovery service was consulted to fully restore the file.
- Outcome: The wedding video was successfully recovered, allowing the couple to relive their special day.
These case studies illustrate the importance of systematically troubleshooting video corruption issues and using the appropriate repair methods. By following these steps, you can increase your chances of successfully recovering your valuable video files.
Are you ready to enhance your automotive repair skills and master remote diagnostic techniques? CAR-REMOTE-REPAIR.EDU.VN offers specialized training and cutting-edge solutions tailored for automotive professionals like you.
Comprehensive Training Programs
Our training programs are designed to equip you with the knowledge and skills needed to diagnose and repair vehicles remotely. Whether you’re a seasoned technician or just starting your career, our courses cover a wide range of topics, including:
- Remote Diagnostic Tools and Software: Learn how to use the latest diagnostic equipment and software to identify and troubleshoot automotive issues from a distance.
- Advanced Troubleshooting Techniques: Master advanced techniques for diagnosing complex problems without needing to be physically present with the vehicle.
- Vehicle Communication Systems: Gain a deep understanding of vehicle communication systems, including CAN bus, OBD-II, and other protocols.
- Remote Programming and Calibration: Learn how to remotely program and calibrate vehicle systems, such as ECUs, immobilizers, and TPMS sensors.
Cutting-Edge Solutions
In addition to our training programs, we also offer a range of cutting-edge solutions to help you streamline your remote repair operations:
- Remote Diagnostic Platforms: Access our cloud-based diagnostic platform, which allows you to connect to vehicles from anywhere in the world.
- Technical Support: Get expert technical support from our team of experienced automotive technicians.
- Equipment and Software: Purchase the latest diagnostic equipment and software at competitive prices.
Why Choose CAR-REMOTE-REPAIR.EDU.VN?
- Expert Instructors: Learn from experienced automotive technicians and industry experts.
- Hands-On Training: Gain practical experience through hands-on training exercises and real-world case studies.
- Flexible Learning Options: Choose from online, in-person, and blended learning options to fit your schedule and learning preferences.
- Career Advancement: Enhance your skills and advance your career in the rapidly growing field of remote automotive repair.
Ready to take your automotive repair skills to the next level?
Visit CAR-REMOTE-REPAIR.EDU.VN today to learn more about our training programs and solutions. Contact us at +1 (641) 206-8880 or visit our location at 1700 W Irving Park Rd, Chicago, IL 60613, United States.
Don’t let corrupted videos ruin your memories or important projects. With the right tools and techniques, you can effectively repair and recover your valuable video files. Start learning today and become a master of remote automotive repair!
FAQ: How to Fix Corrupted Videos Without Software
Q1: Can a corrupted video be fixed without software?
Yes, corrupted videos can often be fixed without software using methods like CHKDSK in Windows, VLC Media Player’s repair function, or converting the video to a different format.
Q2: What causes video corruption?
Video corruption can be caused by hardware issues (e.g., faulty storage devices), software glitches (e.g., video editing errors), or user errors (e.g., improper file handling).