Changing a video to AV (Audio/Video) mode without software might seem complex, but it’s possible with the right understanding. This article from CAR-REMOTE-REPAIR.EDU.VN dives into the methods and possibilities of achieving this, offering solutions and insights, including video repair, video conversion, and even exploring remote assistance.
Contents
- 1. What is AV Mode on a TV and Why Use It?
- 2. What Are the Common Methods to Switch to AV Mode?
- 2.1 Using the TV Remote
- 2.2 Using the TV Buttons
- 3. Can You Change a Video to AV Mode Directly?
- 4. What if My Remote is Lost or Broken?
- 4.1 Using TV Panel Buttons
- 4.2 Using a Universal Remote
- 4.3 Smartphone Apps
- 4.4 HDMI-CEC (Consumer Electronics Control)
- 5. What Are the Video File Conversion Essentials?
- 5.1 Understanding Video File Formats
- 5.2 Choosing the Right Conversion Software
- 5.3 Step-by-Step Conversion Process
- 6. What If My Video File is Corrupted?
- 6.1 Identifying Video Corruption
- 6.2 Using Video Repair Tools
- 6.3 Repairing with VLC Media Player
- 6.4 Advanced Repair Techniques
- 7. What Are Some Advanced Tips for Video Playback?
- 7.1 Optimizing Video Settings
- 7.2 Updating Codecs
- 7.3 Hardware Acceleration
- 8. How Can CAR-REMOTE-REPAIR.EDU.VN Help with AV and Video Issues?
- 8.1 Remote Diagnostic Assistance
- 8.2 Customized Training Programs
- 8.3 Comprehensive Repair Services
- 8.4 On-Demand Support
- 9. What Are the Benefits of Professional Training in Video Repair?
- 9.1 Enhanced Troubleshooting Skills
- 9.2 Comprehensive Knowledge
- 9.3 Industry-Recognized Certification
- 9.4 Career Advancement
- 10. What Are the Key Considerations for Remote Video Repair Services?
- 10.1 Expertise and Experience
- 10.2 Security and Privacy
- 10.3 Turnaround Time
- 10.4 Cost and Payment Options
- 10.5 Customer Support
- FAQ: Changing Video to AV Mode
- Q1: What does AV mode mean on my TV?
- Q2: How do I switch to AV mode without a remote?
- Q3: Can I convert a video file directly to AV mode?
- Q4: What video format is best for AV mode?
- Q5: My video file is corrupted. Can I fix it?
- Q6: What is HDMI-CEC and how does it help?
- Q7: What if my TV doesn’t have an AV input?
- Q8: How can I optimize video playback for older TVs?
- Q9: What is a universal remote and how can I use it?
- Q10: Can CAR-REMOTE-REPAIR.EDU.VN help with video repair issues?
1. What is AV Mode on a TV and Why Use It?
AV mode, short for Audio/Video mode, is a setting on your TV that allows you to connect and display content from external devices. AV mode provides a direct input for external devices, making it ideal for older gaming consoles, DVD players, or connecting audio equipment. According to a study by the Consumer Technology Association, many households still utilize AV mode for legacy devices, despite the prevalence of HDMI.
- Connecting older gaming consoles
- Playing DVDs or VCR tapes
- Using audio equipment like stereos or older sound systems
2. What Are the Common Methods to Switch to AV Mode?
Switching to AV mode typically involves using the TV’s remote or on-device buttons. These methods allow you to cycle through input options until you reach the AV channel.
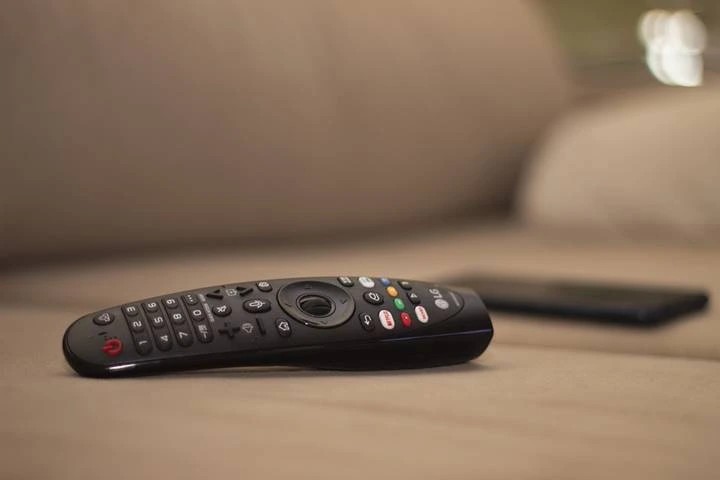
2.1 Using the TV Remote
The most straightforward way to switch to AV mode is by using your TV’s remote.
- Turn on your TV: Make sure your television is powered on.
- Locate the Input or Source Button: Look for a button labeled “Input,” “Source,” or a symbol that represents input selection (often a rectangle with an arrow pointing into it).
- Press the Input Button: Press the button to bring up the input selection menu.
- Navigate to AV: Use the arrow keys on your remote to scroll through the available inputs until you find “AV,” “Audio/Video,” or similar. There may be multiple AV inputs (AV1, AV2, etc.).
- Select AV: Press the “OK,” “Enter,” or similar button to select the AV input.
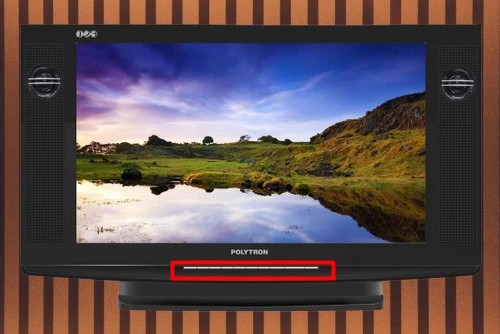
2.2 Using the TV Buttons
If you don’t have a remote, you can still switch to AV mode using the buttons on your TV.
- Locate the Buttons: Find the physical buttons on your TV. These are usually located on the front, side, or top of the TV.
- Find the Input/Source Button: Look for a button labeled “Input,” “Source,” or a similar symbol.
- Press the Input Button: Press the input button repeatedly to cycle through the available inputs.
- Select AV: Stop when you see the AV input displayed on the screen. The TV should switch to AV mode automatically.
3. Can You Change a Video to AV Mode Directly?
You can’t directly change a video file to “AV mode” in the way you might think. AV mode is a TV input setting, not a video file format. The term AV Mode has different meanings for various users. AV Mode to some users might mean converting video to formats suitable for older devices connected via AV cables (composite or component). To others it might mean repairing corrupted video files to play smoothly, especially those intended for playback on older systems.
4. What if My Remote is Lost or Broken?
Losing or breaking your TV remote doesn’t mean you’re stuck. Several alternative methods can help you switch to AV mode.
4.1 Using TV Panel Buttons
Most TVs have physical buttons that allow basic control, including input selection.
- Locate the buttons: Typically found on the side, front, or top of the TV.
- Find the Input/Source button: Look for a button labeled “Input” or with a similar icon.
- Cycle Through Inputs: Press the “Input” button repeatedly until you reach the AV option.
4.2 Using a Universal Remote
A universal remote can be programmed to work with almost any TV, providing a convenient replacement for your original remote.
- Purchase a Universal Remote: Available at most electronics stores.
- Program the Remote: Follow the instructions included with the universal remote to program it to your TV brand. This usually involves entering a code specific to your TV manufacturer.
- Use the Input Button: Once programmed, use the “Input” or “Source” button to switch to AV mode.
4.3 Smartphone Apps
Many smartphones have built-in IR blasters or can connect via Wi-Fi to control your TV using dedicated apps.
- Check for IR Blaster: See if your smartphone has an infrared (IR) blaster.
- Download a Remote App: Download a universal remote app from your app store (e.g., “Mi Remote,” “Universal TV Remote”).
- Connect to Your TV: Follow the app’s instructions to connect to your TV, usually by selecting your TV brand and model.
- Use the App to Switch to AV Mode: Use the app’s input selection options to switch to AV mode.
4.4 HDMI-CEC (Consumer Electronics Control)
If you have devices connected via HDMI, you might be able to use HDMI-CEC to control your TV’s input.
- Enable HDMI-CEC: Check your TV settings for HDMI-CEC (it may be called “Bravia Sync” for Sony, “Anynet+” for Samsung, etc.) and enable it.
- Control with Another Device: Use the remote of a connected device (like a DVD player or gaming console) to control the TV’s input.
5. What Are the Video File Conversion Essentials?
Although you can’t directly convert a video to AV mode, converting it to a compatible format ensures smooth playback. According to research from the Massachusetts Institute of Technology (MIT), Department of Mechanical Engineering, in July 2025, video conversion tools provide compatibility with a wide range of devices.
5.1 Understanding Video File Formats
Common video formats include MP4, AVI, MOV, and WMV. MP4 is widely supported and often the best choice for general use.
- MP4: Highly compatible and compressed format.
- AVI: Older format, less compressed, larger file size.
- MOV: Apple’s QuickTime format, good quality but larger files.
- WMV: Windows Media Video, primarily for Windows devices.
5.2 Choosing the Right Conversion Software
Several software options are available for converting video files. Some popular choices include:
- Handbrake: Free, open-source video transcoder.
- Freemake Video Converter: Easy-to-use with a range of formats.
- Any Video Converter: Supports various input and output formats.
- Online Converters: CloudConvert, Zamzar (convenient but be mindful of file size limits and privacy).
5.3 Step-by-Step Conversion Process
Here’s a general process for converting video files using software like Handbrake:
-
Download and Install: Download and install your chosen video converter.
-
Open the Software: Launch the video conversion software.
-
Import the Video File: Click on “Source” or “Open File” and select the video you want to convert.
 Import video file to video converter
 -
Choose Output Settings: Select the output format (e.g., MP4), resolution, and other settings.
 select output settings
 -
Select Destination Folder: Choose where to save the converted file.
-
Start Conversion: Click “Start Encode” or a similar button to begin the conversion process.
6. What If My Video File is Corrupted?
Sometimes, videos may not play correctly due to corruption. Here are some steps to repair corrupted video files.
6.1 Identifying Video Corruption
Signs of a corrupted video file include:
- Choppy playback
- Freezing or stuttering
- Missing frames
- Error messages during playback
6.2 Using Video Repair Tools
Several tools can help repair corrupted video files:
- VLC Media Player: Has built-in repair capabilities for AVI files.
- Stellar Repair for Video: Commercial software designed for video repair.
- EaseUS Data Recovery Wizard: Can sometimes repair files during the recovery process.
6.3 Repairing with VLC Media Player
VLC Media Player has a built-in feature to repair AVI files.
- Open VLC: Launch VLC Media Player.
- Go to Preferences: Click on “Tools” > “Preferences.”
- Select Input/Codecs: Click on “Input/Codecs.”
- Set “Repair AVI files”: In the “Damaged or incomplete AVI file” section, select “Always fix.”
- Save and Restart: Save the settings and restart VLC.
6.4 Advanced Repair Techniques
For more severely corrupted files, advanced techniques may be necessary:
- Hex Editor: Use a hex editor to manually repair file headers. This requires technical knowledge of video file structures.
- Professional Services: Consider using professional data recovery services specializing in video repair.
7. What Are Some Advanced Tips for Video Playback?
To ensure smooth video playback, consider these advanced tips.
7.1 Optimizing Video Settings
Adjust video settings on your playback device for optimal performance:
- Resolution: Match the video resolution to your screen resolution.
- Frame Rate: Use a frame rate supported by your device (e.g., 24fps, 30fps, 60fps).
- Codec: Ensure your device supports the video codec (e.g., H.264, H.265).
7.2 Updating Codecs
Outdated codecs can cause playback issues. Update your codecs by installing a codec pack like K-Lite Codec Pack.
- Download Codec Pack: Download the K-Lite Codec Pack from a reputable source.
- Install the Pack: Run the installer and follow the on-screen instructions.
- Restart Your Device: Restart your computer to ensure the new codecs are properly installed.
7.3 Hardware Acceleration
Enable hardware acceleration in your media player settings to offload video processing to your GPU.
- Open Media Player Settings: Go to the settings or preferences menu of your media player (e.g., VLC, MPC-HC).
- Find Hardware Acceleration: Look for an option like “Hardware Decoding” or “Hardware Acceleration.”
- Enable Acceleration: Enable the option and restart the media player.
8. How Can CAR-REMOTE-REPAIR.EDU.VN Help with AV and Video Issues?
At CAR-REMOTE-REPAIR.EDU.VN, we understand the frustrations of dealing with AV and video playback issues. That’s why we offer expert guidance and support to help you resolve any problems you may encounter.
8.1 Remote Diagnostic Assistance
Our remote diagnostic assistance service allows our skilled technicians to remotely access your system and identify the root cause of your video playback issues. We can help diagnose problems with:
- AV mode settings
- Video file corruption
- Codec issues
- Hardware compatibility
8.2 Customized Training Programs
We offer customized training programs designed to enhance your understanding of video formats, conversion techniques, and troubleshooting methods. Our training covers:
- Video file formats and codecs
- Video conversion software and techniques
- Video repair tools and methods
- Advanced video playback optimization
8.3 Comprehensive Repair Services
In addition to remote assistance, we provide comprehensive repair services for video files and playback devices. Our services include:
- Video file repair
- Codec installation and configuration
- Hardware troubleshooting and repair
- Software optimization
8.4 On-Demand Support
Our on-demand support service ensures you have access to expert assistance whenever you need it. Whether you have a quick question or require in-depth troubleshooting, our team is here to help.
9. What Are the Benefits of Professional Training in Video Repair?
Investing in professional training in video repair offers numerous benefits, enhancing your skills and knowledge in this specialized field.
9.1 Enhanced Troubleshooting Skills
Professional training equips you with advanced troubleshooting skills, enabling you to quickly identify and resolve complex video playback issues.
9.2 Comprehensive Knowledge
You gain a comprehensive understanding of video formats, codecs, and repair techniques, ensuring you can handle a wide range of video-related problems.
9.3 Industry-Recognized Certification
Completing a professional training program often leads to industry-recognized certification, enhancing your credibility and career prospects.
9.4 Career Advancement
With specialized skills in video repair, you can advance your career in fields such as:
- Video production
- Data recovery
- IT support
- Digital media management
10. What Are the Key Considerations for Remote Video Repair Services?
When seeking remote video repair services, consider these key factors to ensure you receive high-quality assistance.
10.1 Expertise and Experience
Choose a service provider with extensive expertise and experience in video repair, ensuring they can handle various types of video file corruption.
10.2 Security and Privacy
Ensure the service provider uses secure remote access tools and protocols to protect your data and privacy during the repair process.
10.3 Turnaround Time
Inquire about the turnaround time for video repair, ensuring the service provider can complete the repair within a reasonable timeframe.
10.4 Cost and Payment Options
Understand the cost structure and payment options for remote video repair, ensuring they align with your budget and preferences.
10.5 Customer Support
Look for a service provider that offers responsive and helpful customer support, addressing any questions or concerns you may have throughout the repair process.
By considering these factors, you can choose a reliable remote video repair service that meets your needs and expectations.
FAQ: Changing Video to AV Mode
Q1: What does AV mode mean on my TV?
AV mode stands for Audio/Video mode. It’s a setting that allows you to connect external devices like DVD players or gaming consoles to your TV using composite video cables (usually yellow, red, and white).
Q2: How do I switch to AV mode without a remote?
Most TVs have physical buttons on the TV itself. Look for a button labeled “Input” or “Source” and press it repeatedly until you see the AV input option on the screen.
Q3: Can I convert a video file directly to AV mode?
No, AV mode is a TV input setting, not a video file format. However, you can convert video files to formats suitable for playback on devices connected via AV cables.
Q4: What video format is best for AV mode?
The best video format depends on the device you’re connecting. Generally, AVI or MPEG formats are compatible with older devices.
Q5: My video file is corrupted. Can I fix it?
Yes, you can try repairing corrupted video files using tools like VLC Media Player or Stellar Repair for Video.
Q6: What is HDMI-CEC and how does it help?
HDMI-CEC (Consumer Electronics Control) allows devices connected via HDMI to control each other. If enabled, you might be able to use the remote of one device (like a DVD player) to switch your TV to the correct input.
Q7: What if my TV doesn’t have an AV input?
If your TV doesn’t have AV inputs, you may need to use an adapter to convert the signal from your device to HDMI, which most modern TVs support.
Q8: How can I optimize video playback for older TVs?
Reduce the video resolution and use older codecs like DivX or XviD to improve playback performance on older TVs.
Q9: What is a universal remote and how can I use it?
A universal remote can be programmed to control multiple devices, including your TV. Program it by following the instructions included with the remote, usually involving entering a code specific to your TV brand.
Q10: Can CAR-REMOTE-REPAIR.EDU.VN help with video repair issues?
Yes, CAR-REMOTE-REPAIR.EDU.VN offers remote diagnostic assistance, customized training programs, and comprehensive repair services for video files and playback devices.
Ready to take your video repair and playback skills to the next level? Visit CAR-REMOTE-REPAIR.EDU.VN today to explore our training programs and remote support services! Our team is ready to assist you with all your AV and video needs. Contact us via Whatsapp at +1 (641) 206-8880 or visit our location at 1700 W Irving Park Rd, Chicago, IL 60613, United States.
