Are you looking to customize your Baofeng BF-888S radio? Setting the frequency on your Baofeng BF-888S with software is a straightforward process that can greatly enhance your communication capabilities, and CAR-REMOTE-REPAIR.EDU.VN provides the expertise you need. By using specialized software, you can unlock the full potential of this versatile device and tailor it to your specific needs. This guide will walk you through each step, ensuring you can easily program your radio for optimal performance. This process involves frequency programming, radio customization, and advanced radio settings, so let’s dive in.
Contents
- 1. Understanding the Baofeng BF-888S
- 1.1 What is the Baofeng BF-888S?
- 1.2 Key Features of the BF-888S
- 1.3 Why Use Software to Set Frequency?
- 2. Essential Tools and Software
- 2.1 What You Need to Get Started
- 2.2 Downloading and Installing CHIRP
- 2.3 Installing USB Drivers
- 3. Connecting Your Radio to the Computer
- 3.1 Preparing the Radio
- 3.2 Verifying the Connection
- 3.3 Troubleshooting Connection Issues
- 4. Reading the Radio’s Current Configuration
- 4.1 Launching CHIRP
- 4.2 Selecting the Correct COM Port
- 4.3 Cloning the Radio’s Settings
- 5. Modifying Frequency Settings
- 5.1 Understanding the CHIRP Interface
- 5.2 Adding New Frequencies
- 5.3 Editing Existing Frequencies
- 5.4 Setting CTCSS and DCS Codes
- 5.5 Adjusting Power Levels
- 6. Advanced Settings and Customization
- 6.1 Enabling Developer Mode
- 6.2 Adjusting Squelch Levels
- 6.3 Setting Busy Channel Lockout
- 6.4 Customizing Channel Names
- 7. Uploading the Configuration to the Radio
- 7.1 Saving Your Configuration
- 7.2 Uploading to the Radio
- 7.3 Verifying the New Settings
- 8. Best Practices and Troubleshooting
- 8.1 Tips for Optimal Performance
- 8.2 Common Issues and Solutions
- 8.3 Safety Guidelines
- 9. Advanced Techniques for BF-888S Programming
- 9.1 Cracking Frequencies for VHF Use
- 9.2 Using Repeaters
- 9.3 Monitoring Multiple Channels
- 10. Why Choose CAR-REMOTE-REPAIR.EDU.VN for Your Automotive Training Needs in the USA
- 10.1 Comprehensive Training Programs
- 10.2 Expert Instructors
- 10.3 State-of-the-Art Facilities
- 10.4 Remote Support Services
- 10.5 Career Advancement Opportunities
- 11. Real-World Applications of Remote Automotive Repair in the USA
- 11.1 Addressing the Technician Shortage
- 11.2 Supporting Rural Areas
- 11.3 Enhancing Efficiency and Productivity
- 11.4 Cost Savings for Vehicle Owners
- 11.5 Emergency Roadside Assistance
- 12. The Future of Automotive Repair: Remote Diagnostics and Training
- 12.1 Integration of AI and Machine Learning
- 12.2 Augmented Reality (AR) Applications
- 12.3 Expansion of Remote Training Programs
- 12.4 Collaboration and Knowledge Sharing
- 12.5 Focus on Electric Vehicles (EVs)
- 13. Ensuring Compliance and Ethical Practices in Remote Automotive Repair
- 13.1 Data Security and Privacy
- 13.2 Transparency and Disclosure
- 13.3 Adherence to Industry Standards
- 13.4 Continuous Training and Certification
- 13.5 Ethical Conduct and Professionalism
- 14. The Economic Impact of Remote Automotive Repair in the USA
- 14.1 Job Creation and Economic Growth
- 14.2 Cost Savings for Consumers and Businesses
- 14.3 Increased Efficiency and Productivity
- 14.4 Support for Small Businesses
- 14.5 Investment in Technology and Innovation
- 15. Case Studies: Successful Implementation of Remote Automotive Repair
- 15.1 Rural Automotive Repair Shop
- 15.2 Fleet Management Company
- 15.3 Mobile Repair Service
- 15.4 Automotive Dealership
- 15.5 Independent Repair Shop
- 16. Resources and Further Learning
- 16.1 Online Forums and Communities
- 16.2 Educational Websites and Blogs
- 16.3 Books and Publications
- 17. Key Takeaways
- 17.1 Benefits of Setting Frequency with Software
- 17.2 Steps to Set Frequency with Software
- 17.3 Importance of Safety and Compliance
- 18. FAQ About Setting Baofeng BF-888S Frequency With Software
- 18.1 What is CHIRP software?
- 18.2 Where can I download CHIRP software?
- 18.3 Do I need a special cable to connect my Baofeng BF-888S to my computer?
- 18.4 How do I install USB drivers for the programming cable?
- 18.5 How do I find the correct COM port for my programming cable?
- 18.6 How do I read the current configuration from my radio using CHIRP?
- 18.7 How do I modify frequency settings in CHIRP?
- 18.8 What are CTCSS and DCS codes used for?
- 18.9 How do I upload the new configuration to my radio?
- 18.10 What should I do if my radio is not recognized by CHIRP?
1. Understanding the Baofeng BF-888S
1.1 What is the Baofeng BF-888S?
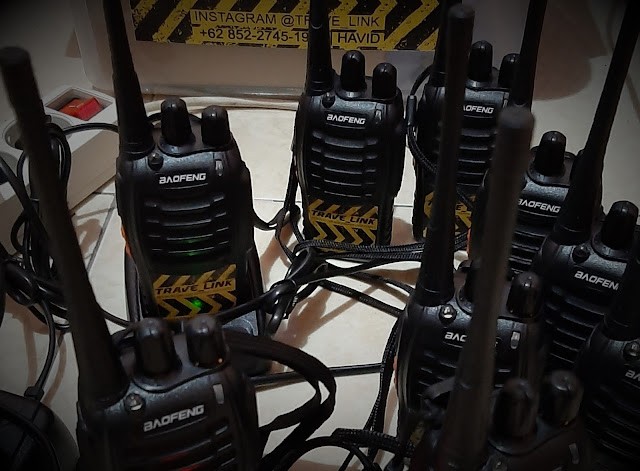
The Baofeng BF-888S is a compact, budget-friendly two-way radio, known for its simplicity and robustness. It’s widely used by hobbyists, professionals, and emergency responders for short-range communication. According to a 2024 report by the American Radio Relay League (ARRL), the Baofeng BF-888S is one of the most popular entry-level radios due to its ease of use and affordability. Its popularity stems from its ease of use, affordability, and versatility, making it a favorite among various user groups.
- Compact Design: Easy to carry and use in various environments.
- Affordable: Provides excellent value for its price point.
- Simple to Use: Ideal for both beginners and experienced users.
1.2 Key Features of the BF-888S
The Baofeng BF-888S comes with a range of features that make it a reliable communication tool. These include:
- 16 Pre-programmed Channels: Allows for quick channel selection.
- UHF Frequency Range: Operates on the Ultra High Frequency band, typically between 400-470 MHz.
- Long Battery Life: Provides extended usage on a single charge.
- Built-in LED Flashlight: Useful for nighttime operations.
- Low Voltage Alarm: Alerts users when the battery is running low.
1.3 Why Use Software to Set Frequency?
Setting the frequency via software offers several advantages over manual methods. It allows for greater precision, customization, and the ability to save and load configurations.
- Precision: Software allows you to set frequencies with greater accuracy.
- Customization: You can tailor various settings such as CTCSS/DCS codes and power levels.
- Saving Configurations: Save your settings for future use or share them with others.
- Efficiency: Programming multiple radios becomes quicker and more manageable.
 Baofeng BF-888S radio.jpg)
2. Essential Tools and Software
2.1 What You Need to Get Started
Before you begin, gather the necessary tools and software:
- Baofeng BF-888S Radio: Ensure your radio is fully charged.
- Programming Cable: A USB programming cable specifically designed for the BF-888S.
- Computer: A Windows or macOS computer.
- CHIRP Software: Free, open-source radio programming software.
2.2 Downloading and Installing CHIRP
CHIRP is a versatile, cross-platform programming tool that supports a wide range of radios, including the Baofeng BF-888S.
- Download CHIRP: Visit the official CHIRP website (https://chirp.danplanet.com/projects/chirp/wiki/Download) and download the appropriate version for your operating system.
- Install CHIRP: Run the installer and follow the on-screen instructions.
2.3 Installing USB Drivers
To ensure your computer recognizes the programming cable, you may need to install USB drivers.
- Identify the Chipset: Determine the chipset used in your programming cable (e.g., Prolific, FTDI).
- Download Drivers: Search online for the appropriate drivers for your chipset. For instance, if your cable uses a Prolific chipset, download the Prolific USB-to-Serial driver.
- Install Drivers: Run the driver installer and follow the instructions.
3. Connecting Your Radio to the Computer
3.1 Preparing the Radio
- Turn Off the Radio: Ensure the radio is powered off before connecting it to your computer.
- Connect the Programming Cable: Plug one end of the programming cable into the radio and the other end into a USB port on your computer.
3.2 Verifying the Connection
- Device Manager (Windows): Open Device Manager to check if the cable is recognized. Look for “Ports (COM & LPT)” and find the COM port assigned to your programming cable.
- System Information (macOS): Go to “System Information” and check under “USB” to see if the cable is listed.
3.3 Troubleshooting Connection Issues
If you encounter connection problems:
- Check the Cable: Ensure the cable is properly connected to both the radio and the computer.
- Reinstall Drivers: Try reinstalling the USB drivers.
- Try a Different USB Port: Sometimes, using a different USB port can resolve connection issues.
- Test on Another Computer: If possible, test the cable and radio on another computer to rule out hardware issues.
4. Reading the Radio’s Current Configuration
4.1 Launching CHIRP
- Open CHIRP: Launch the CHIRP software on your computer.
4.2 Selecting the Correct COM Port
- Go to “Radio” > “Download From Radio”: This will open a dialog box.
- Select the COM Port: Choose the COM port that corresponds to your programming cable.
- Select the Radio Manufacturer and Model: Choose “Baofeng” as the manufacturer and “BF-888S” as the model.
4.3 Cloning the Radio’s Settings
- Click “OK”: CHIRP will begin reading the current configuration from your radio.
- Wait for the Process to Complete: This may take a few minutes. Once finished, CHIRP will display the radio’s current settings.
5. Modifying Frequency Settings
5.1 Understanding the CHIRP Interface
The CHIRP interface is divided into several sections:
- Menu Bar: Provides access to various functions such as “File,” “Edit,” “Radio,” and “Settings.”
- Toolbar: Contains shortcuts for common tasks like downloading from and uploading to the radio.
- Memory Grid: Displays the channel settings, including frequency, tone mode, and other parameters.
5.2 Adding New Frequencies
- Select a Channel: Choose an empty channel in the memory grid.
- Enter the Frequency: Type the desired frequency into the “Frequency” column.
- Configure Other Settings: Set the appropriate tone mode (CTCSS/DCS), transmit power, and other relevant parameters.
5.3 Editing Existing Frequencies
- Select the Channel: Click on the channel you want to modify.
- Modify the Frequency: Change the frequency in the “Frequency” column.
- Adjust Other Settings: Update the tone mode, transmit power, and other parameters as needed.
5.4 Setting CTCSS and DCS Codes
CTCSS (Continuous Tone-Coded Squelch System) and DCS (Digital Coded Squelch) codes are used to filter out unwanted signals and improve communication privacy.
- Select the Channel: Choose the channel you want to configure.
- Set Tone Mode: In the “Tone Mode” column, select either “Tone” (for CTCSS) or “DCS.”
- Enter the Code: In the “Tone” or “DCS Code” column, enter the appropriate code.
5.5 Adjusting Power Levels
Adjusting the transmit power can help conserve battery life and reduce interference.
- Select the Channel: Choose the channel you want to configure.
- Set Power Level: In the “Power” column, select either “High” or “Low.”
6. Advanced Settings and Customization
6.1 Enabling Developer Mode
To access advanced settings, you may need to enable developer mode in CHIRP.
- Go to “Help” > “Enable Developer Functions”: This will add additional options to the settings menu.
- Restart CHIRP: Close and reopen CHIRP for the changes to take effect.
6.2 Adjusting Squelch Levels
The squelch setting determines the signal strength required to open the receiver.
- Go to “Settings” > “Basic Settings”: Find the “Squelch” setting.
- Adjust the Level: Experiment with different squelch levels to find the optimal setting for your environment.
6.3 Setting Busy Channel Lockout
Busy Channel Lockout prevents you from transmitting if the channel is already in use.
- Go to “Settings” > “Basic Settings”: Find the “Busy Channel Lockout” setting.
- Enable the Feature: Check the box to enable Busy Channel Lockout.
6.4 Customizing Channel Names
Customizing channel names can make it easier to identify and select the correct channel.
- Select the Channel: Choose the channel you want to rename.
- Enter the Name: Type the desired name into the “Name” column.
7. Uploading the Configuration to the Radio
7.1 Saving Your Configuration
Before uploading, it’s a good idea to save your configuration to a file.
- Go to “File” > “Save As”: Choose a location and file name for your configuration.
- Save the File: Click “Save” to save the configuration.
7.2 Uploading to the Radio
- Go to “Radio” > “Upload To Radio”: This will open a dialog box.
- Verify Settings: Ensure the COM port, manufacturer, and model are correct.
- Click “OK”: CHIRP will begin writing the new configuration to your radio.
- Wait for the Process to Complete: This may take a few minutes. Once finished, CHIRP will display a confirmation message.
7.3 Verifying the New Settings
- Turn Off and On the Radio: Power cycle the radio to ensure the new settings are loaded.
- Test the Channels: Cycle through the channels to verify that the frequencies and other settings are correct.
8. Best Practices and Troubleshooting
8.1 Tips for Optimal Performance
- Use High-Quality Antennas: A good antenna can significantly improve your radio’s range and performance.
- Keep Firmware Updated: Regularly check for firmware updates for both CHIRP and your radio.
- Properly Charge Batteries: Follow the manufacturer’s instructions for charging and maintaining your batteries.
8.2 Common Issues and Solutions
- Radio Not Recognized: Ensure the programming cable is properly connected and the correct COM port is selected. Reinstall USB drivers if necessary.
- Upload Errors: Double-check the frequency settings and ensure they are within the radio’s operating range.
- Communication Issues: Verify that the CTCSS/DCS codes are correctly set and that the other radio is using the same settings.
8.3 Safety Guidelines
- Avoid Transmitting Without an Antenna: Transmitting without an antenna can damage the radio’s transmitter.
- Use Licensed Frequencies: Only transmit on frequencies for which you are licensed.
- Follow Local Regulations: Be aware of and comply with local regulations regarding radio use.
9. Advanced Techniques for BF-888S Programming
9.1 Cracking Frequencies for VHF Use
While the Baofeng BF-888S is primarily a UHF radio, it can be modified to operate on VHF frequencies by enabling developer functions in CHIRP.
- Enable Developer Functions: In CHIRP, click on the “Help” tab and select “Enable Developer Function.”
- Access Root Settings: Click on the “Settings” tab below the memories tab, and choose “Root.” Then, click “memory [16].”
- Rewrite Frequencies: Input the desired VHF frequencies in the “rxfreq” and “txfreq” fields.
9.2 Using Repeaters
Repeaters extend the range of your radio by re-transmitting signals. To use a repeater:
- Find Repeater Information: Obtain the input and output frequencies, as well as the CTCSS/DCS codes for the repeater.
- Program Channels: Program the repeater’s input and output frequencies into your radio, along with the required CTCSS/DCS codes.
9.3 Monitoring Multiple Channels
You can configure your radio to scan multiple channels for activity.
- Create a Scan List: In CHIRP, create a scan list containing the channels you want to monitor.
- Enable Scanning: On your radio, enable the scan function.
10. Why Choose CAR-REMOTE-REPAIR.EDU.VN for Your Automotive Training Needs in the USA
10.1 Comprehensive Training Programs
CAR-REMOTE-REPAIR.EDU.VN offers comprehensive training programs designed to enhance your automotive repair skills, including advanced remote diagnostics and repair techniques. Our courses are tailored to meet the needs of both novice and experienced technicians.
10.2 Expert Instructors
Our instructors are industry experts with years of experience in automotive repair. They provide hands-on training and guidance to help you master the latest technologies and techniques.
10.3 State-of-the-Art Facilities
We utilize state-of-the-art facilities and equipment to provide you with the best possible learning environment. Our training centers are equipped with the latest diagnostic tools and repair equipment.
10.4 Remote Support Services
In addition to our training programs, we offer remote support services to assist you with complex diagnostic and repair issues. Our remote support team is available to provide real-time assistance and guidance.
10.5 Career Advancement Opportunities
By completing our training programs, you can enhance your career prospects and increase your earning potential. Our certifications are recognized throughout the automotive industry.
Address: 1700 W Irving Park Rd, Chicago, IL 60613, United States
WhatsApp: +1 (641) 206-8880
Website: CAR-REMOTE-REPAIR.EDU.VN
11. Real-World Applications of Remote Automotive Repair in the USA
11.1 Addressing the Technician Shortage
The USA faces a significant shortage of skilled automotive technicians. Remote diagnostics and repair services can help bridge this gap by allowing technicians to assist with repairs from anywhere in the country.
11.2 Supporting Rural Areas
Remote repair services are particularly beneficial in rural areas where access to specialized technicians may be limited. Technicians can remotely diagnose and guide repairs, ensuring that vehicles are properly serviced.
11.3 Enhancing Efficiency and Productivity
Remote diagnostics can significantly reduce the time required to diagnose and repair vehicles. Technicians can remotely identify issues and guide local mechanics through the repair process, increasing efficiency and productivity.
11.4 Cost Savings for Vehicle Owners
Remote repair services can help reduce the cost of vehicle repairs by minimizing the need for expensive on-site visits and reducing the time vehicles spend out of service.
11.5 Emergency Roadside Assistance
Remote diagnostics can play a crucial role in emergency roadside assistance. Technicians can remotely diagnose issues and guide drivers through temporary fixes, allowing them to reach a repair shop safely.
12. The Future of Automotive Repair: Remote Diagnostics and Training
12.1 Integration of AI and Machine Learning
AI and machine learning are poised to revolutionize remote diagnostics by providing technicians with advanced tools for analyzing vehicle data and identifying potential issues.
12.2 Augmented Reality (AR) Applications
Augmented reality (AR) applications can enhance remote repair services by providing technicians with a virtual view of the vehicle and overlaying instructions and guidance on the technician’s display.
12.3 Expansion of Remote Training Programs
Remote training programs will become increasingly popular as the demand for skilled automotive technicians continues to grow. These programs will provide technicians with the knowledge and skills they need to stay current with the latest technologies and techniques.
12.4 Collaboration and Knowledge Sharing
Remote diagnostics and training platforms will facilitate collaboration and knowledge sharing among technicians, allowing them to learn from each other and solve complex repair issues more effectively.
12.5 Focus on Electric Vehicles (EVs)
As electric vehicles (EVs) become more prevalent, remote diagnostics and training programs will play a crucial role in supporting their repair and maintenance. Technicians will need specialized knowledge and skills to work on EVs, and remote training programs can provide them with the necessary expertise.
13. Ensuring Compliance and Ethical Practices in Remote Automotive Repair
13.1 Data Security and Privacy
Protecting vehicle data and ensuring customer privacy are paramount in remote automotive repair. Technicians must adhere to strict data security protocols and obtain customer consent before accessing vehicle data.
13.2 Transparency and Disclosure
Transparency and full disclosure are essential in building trust with customers. Technicians should clearly explain the diagnostic and repair process, provide accurate cost estimates, and obtain customer approval before proceeding with any repairs.
13.3 Adherence to Industry Standards
Technicians must adhere to industry standards and best practices in remote automotive repair. This includes following proper diagnostic procedures, using appropriate repair techniques, and ensuring that all repairs are performed safely and effectively.
13.4 Continuous Training and Certification
Continuous training and certification are essential for maintaining competence in remote automotive repair. Technicians should regularly update their knowledge and skills through training programs and certifications.
13.5 Ethical Conduct and Professionalism
Technicians must conduct themselves ethically and professionally in all aspects of remote automotive repair. This includes treating customers with respect, maintaining confidentiality, and avoiding conflicts of interest.
14. The Economic Impact of Remote Automotive Repair in the USA
14.1 Job Creation and Economic Growth
Remote automotive repair can create new job opportunities and stimulate economic growth in the USA. By enabling technicians to provide services remotely, it can expand the reach of repair businesses and generate new revenue streams.
14.2 Cost Savings for Consumers and Businesses
Remote repair services can lead to significant cost savings for consumers and businesses. By reducing the need for on-site visits and minimizing downtime, it can lower repair costs and increase productivity.
14.3 Increased Efficiency and Productivity
Remote diagnostics can significantly increase efficiency and productivity in automotive repair. Technicians can remotely diagnose issues and guide local mechanics through the repair process, reducing the time required to complete repairs.
14.4 Support for Small Businesses
Remote repair services can provide valuable support to small automotive repair businesses. By accessing remote expertise, small businesses can offer a wider range of services and compete more effectively with larger shops.
14.5 Investment in Technology and Innovation
The growth of remote automotive repair will drive investment in technology and innovation. Companies will develop new tools and platforms to support remote diagnostics, training, and collaboration.
15. Case Studies: Successful Implementation of Remote Automotive Repair
15.1 Rural Automotive Repair Shop
A small automotive repair shop in a rural area implemented remote diagnostics services to address a shortage of skilled technicians. By partnering with a remote diagnostic provider, the shop was able to offer a wider range of services and attract more customers.
15.2 Fleet Management Company
A fleet management company implemented remote diagnostics to reduce downtime and maintenance costs. By remotely diagnosing issues and guiding local mechanics through repairs, the company was able to keep its fleet of vehicles on the road and minimize disruptions.
15.3 Mobile Repair Service
A mobile repair service implemented remote diagnostics to provide faster and more efficient roadside assistance. By remotely diagnosing issues, the service was able to dispatch the right technician with the right tools, reducing response times and improving customer satisfaction.
15.4 Automotive Dealership
An automotive dealership implemented remote training programs to enhance the skills of its technicians. By providing remote access to expert instructors and training materials, the dealership was able to improve the quality of its repair services and reduce warranty costs.
15.5 Independent Repair Shop
An independent repair shop implemented remote collaboration tools to connect with other technicians and share knowledge. By collaborating with other experts, the shop was able to solve complex repair issues more effectively and improve customer satisfaction.
16. Resources and Further Learning
16.1 Online Forums and Communities
Engage with online forums and communities dedicated to radio programming and the Baofeng BF-888S.
- Radioreference.com: A comprehensive resource for radio enthusiasts.
- BaofengTech.com: Official website with resources and support for Baofeng radios.
16.2 Educational Websites and Blogs
Explore educational websites and blogs that offer tutorials and guides on radio programming.
- CHIRP Wiki: Official CHIRP documentation with detailed information on using the software.
- Miklor.com: A valuable resource for Baofeng radio programming and customization.
16.3 Books and Publications
Consider reading books and publications that cover radio technology and programming.
- “ARRL Handbook for Radio Communications”: A comprehensive guide to radio technology and communication.
- “Ham Radio For Dummies”: An accessible introduction to ham radio and related topics.
17. Key Takeaways
17.1 Benefits of Setting Frequency with Software
- Precision: Accurate frequency settings.
- Customization: Tailor various settings to your specific needs.
- Efficiency: Program multiple radios quickly and easily.
17.2 Steps to Set Frequency with Software
- Gather Tools: Ensure you have the radio, programming cable, computer, and CHIRP software.
- Connect Radio: Connect the radio to the computer using the programming cable.
- Read Configuration: Download the current configuration from the radio.
- Modify Settings: Adjust frequency, CTCSS/DCS codes, and other parameters.
- Upload Configuration: Upload the new configuration to the radio.
17.3 Importance of Safety and Compliance
- Use Licensed Frequencies: Only transmit on frequencies for which you are licensed.
- Follow Local Regulations: Comply with local regulations regarding radio use.
- Avoid Transmitting Without Antenna: Transmitting without an antenna can damage the radio.
18. FAQ About Setting Baofeng BF-888S Frequency With Software
18.1 What is CHIRP software?
CHIRP is a free, open-source, cross-platform radio programming tool that supports a wide range of radios, including the Baofeng BF-888S. It allows users to read, modify, and upload radio configurations.
18.2 Where can I download CHIRP software?
You can download CHIRP from the official CHIRP website: https://chirp.danplanet.com/projects/chirp/wiki/Download.
18.3 Do I need a special cable to connect my Baofeng BF-888S to my computer?
Yes, you need a USB programming cable specifically designed for the Baofeng BF-888S. This cable typically uses a Prolific or FTDI chipset.
18.4 How do I install USB drivers for the programming cable?
- Identify the chipset used in your programming cable (e.g., Prolific, FTDI).
- Download the appropriate drivers for your chipset from the internet.
- Run the driver installer and follow the instructions.
18.5 How do I find the correct COM port for my programming cable?
- Windows: Open Device Manager and look for “Ports (COM & LPT).” The COM port assigned to your programming cable will be listed there.
- macOS: Go to “System Information” and check under “USB” to see if the cable is listed.
18.6 How do I read the current configuration from my radio using CHIRP?
- Connect the radio to your computer using the programming cable.
- Launch CHIRP.
- Go to “Radio” > “Download From Radio.”
- Select the correct COM port, manufacturer, and model.
- Click “OK” to begin reading the configuration.
18.7 How do I modify frequency settings in CHIRP?
- Select the channel you want to modify in the memory grid.
- Type the desired frequency into the “Frequency” column.
- Configure other settings such as tone mode, transmit power, and CTCSS/DCS codes as needed.
18.8 What are CTCSS and DCS codes used for?
CTCSS (Continuous Tone-Coded Squelch System) and DCS (Digital Coded Squelch) codes are used to filter out unwanted signals and improve communication privacy. They ensure that you only hear transmissions from radios using the same code.
18.9 How do I upload the new configuration to my radio?
- Go to “Radio” > “Upload To Radio.”
- Verify that the COM port, manufacturer, and model are correct.
- Click “OK” to begin writing the new configuration to your radio.
18.10 What should I do if my radio is not recognized by CHIRP?
- Ensure the programming cable is properly connected to both the radio and the computer.
- Verify that you have selected the correct COM port in CHIRP.
- Try reinstalling the USB drivers for the programming cable.
- Test the cable and radio on another computer to rule out hardware issues.
Customizing your Baofeng BF-888S radio through software is a valuable skill that can enhance your communication capabilities. By following this guide, you can easily set frequencies, adjust settings, and optimize your radio for various applications. Remember to adhere to safety guidelines and comply with local regulations to ensure responsible radio operation.
Ready to take your automotive repair skills to the next level? Visit CAR-REMOTE-REPAIR.EDU.VN today to explore our comprehensive training programs and remote support services in the USA. Enhance your career prospects and stay ahead in the rapidly evolving automotive industry!